How We Sharpen Your Knives
We've recently upgraded our sharpening setup with new equipment, fine-tuned our process, and even started using a digital microscope (a Christmas gift for Dash) to analyze our results. We thought it would be interesting to take you through our standard six-step sharpening process, using a typical kitchen knife as an example.
For this demonstration, we're sharpening a Japanese knife, which has harder steel and requires a slightly steeper edge angle than a Western knife. However, the overall process remains the same for more than 90% of the kitchen knives we sharpen.
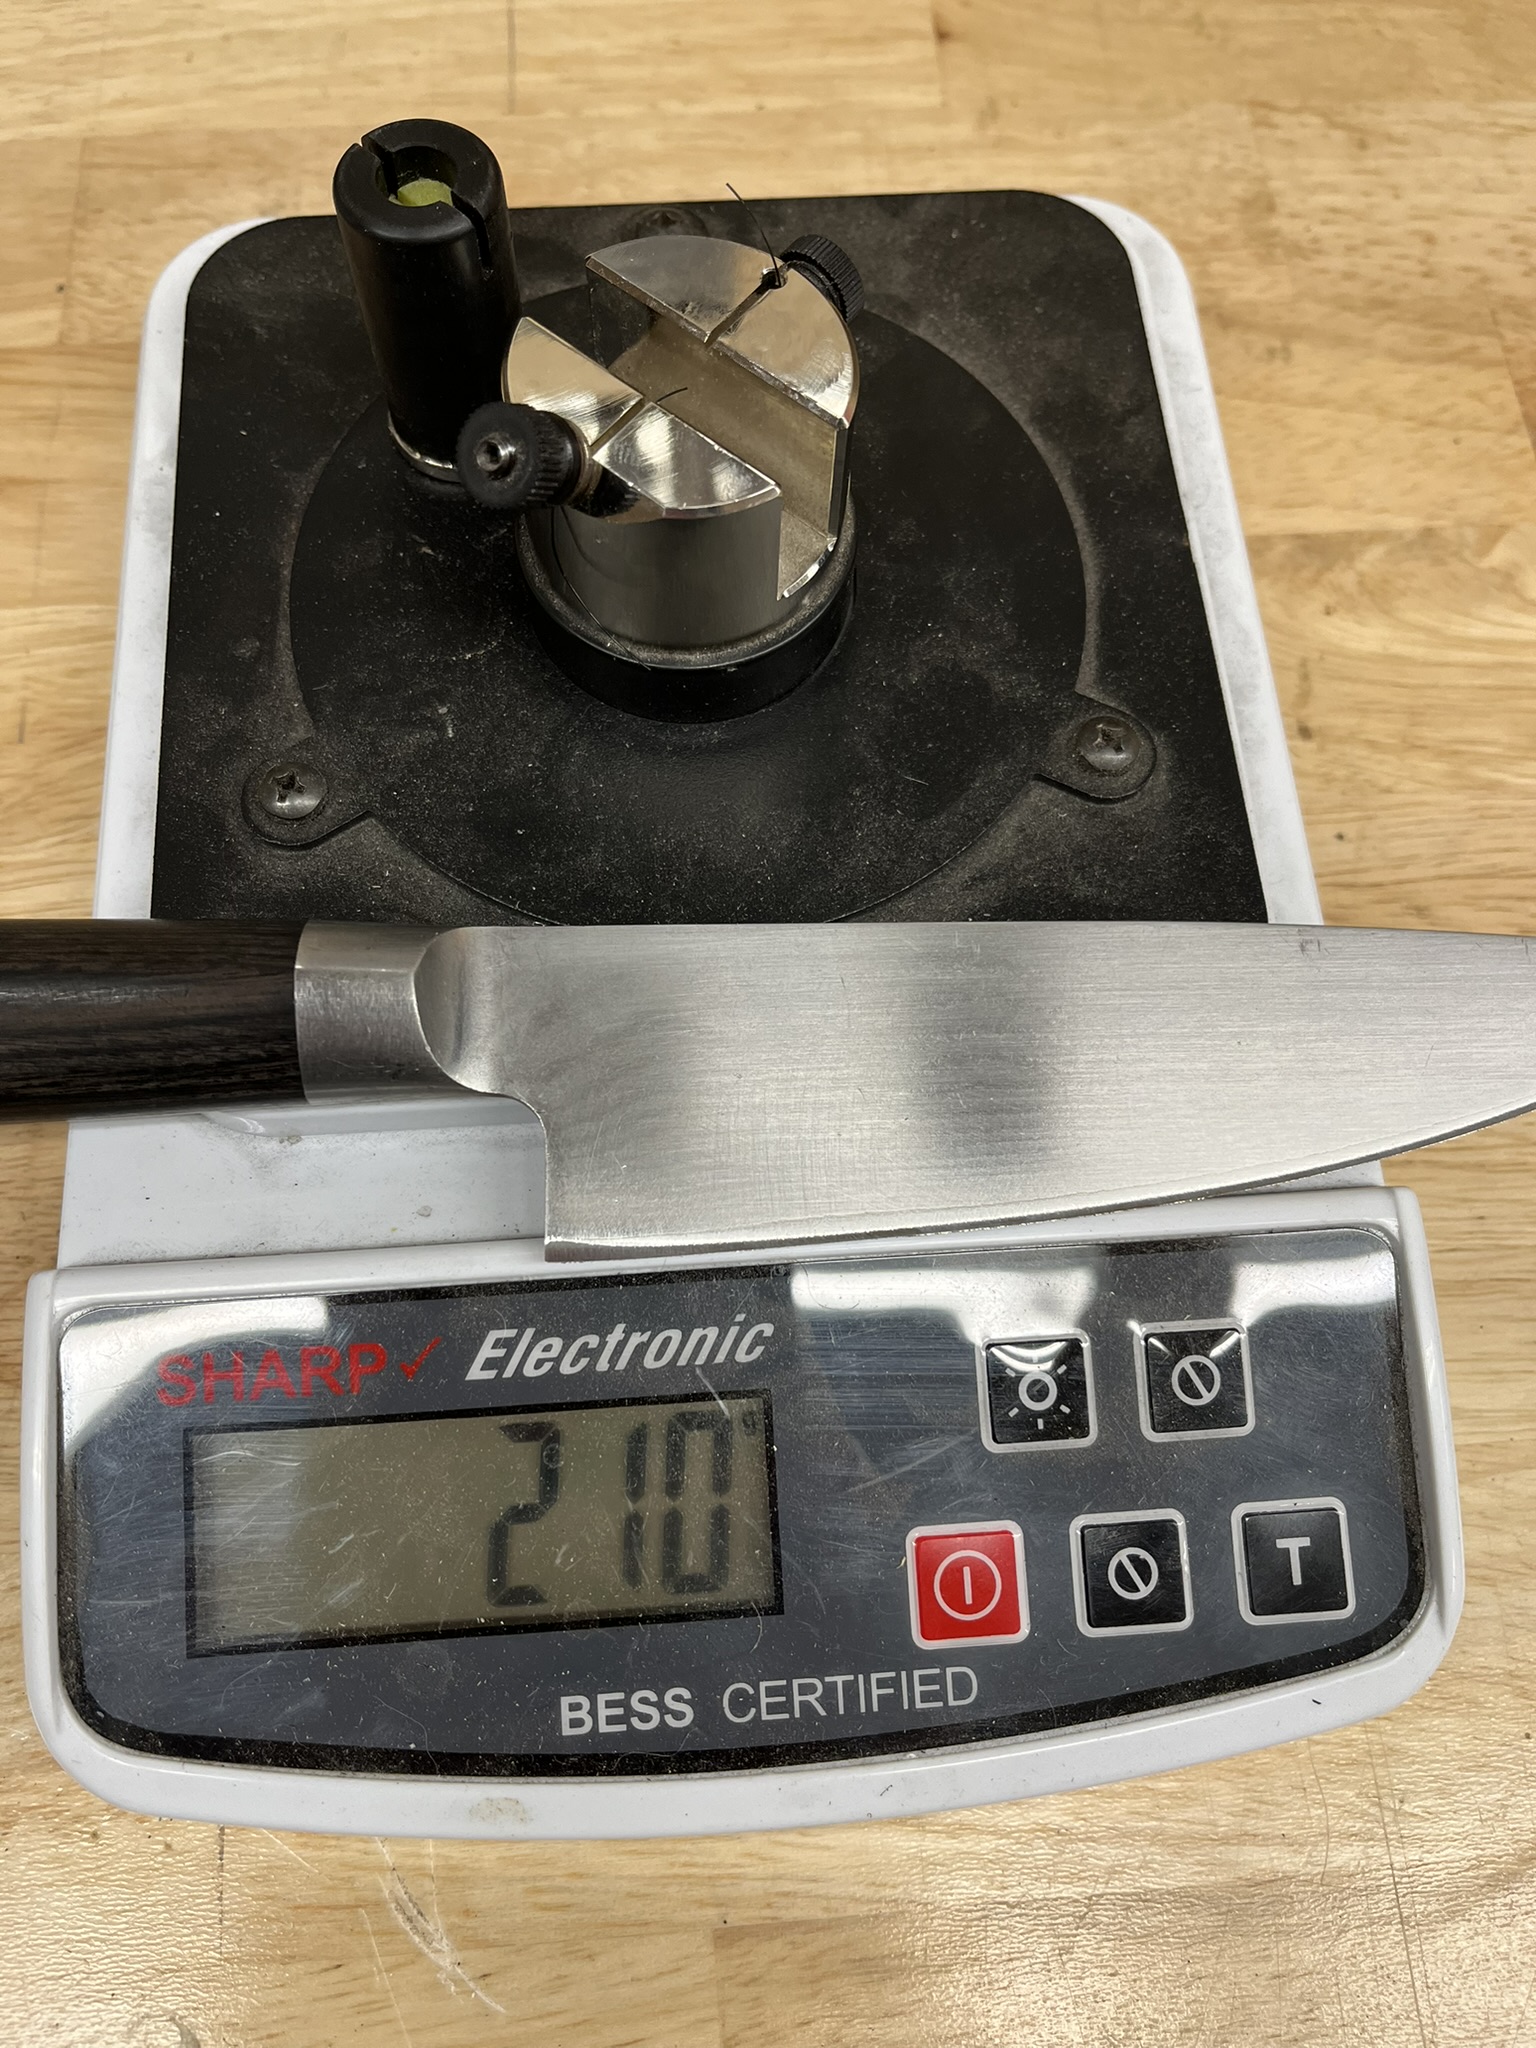
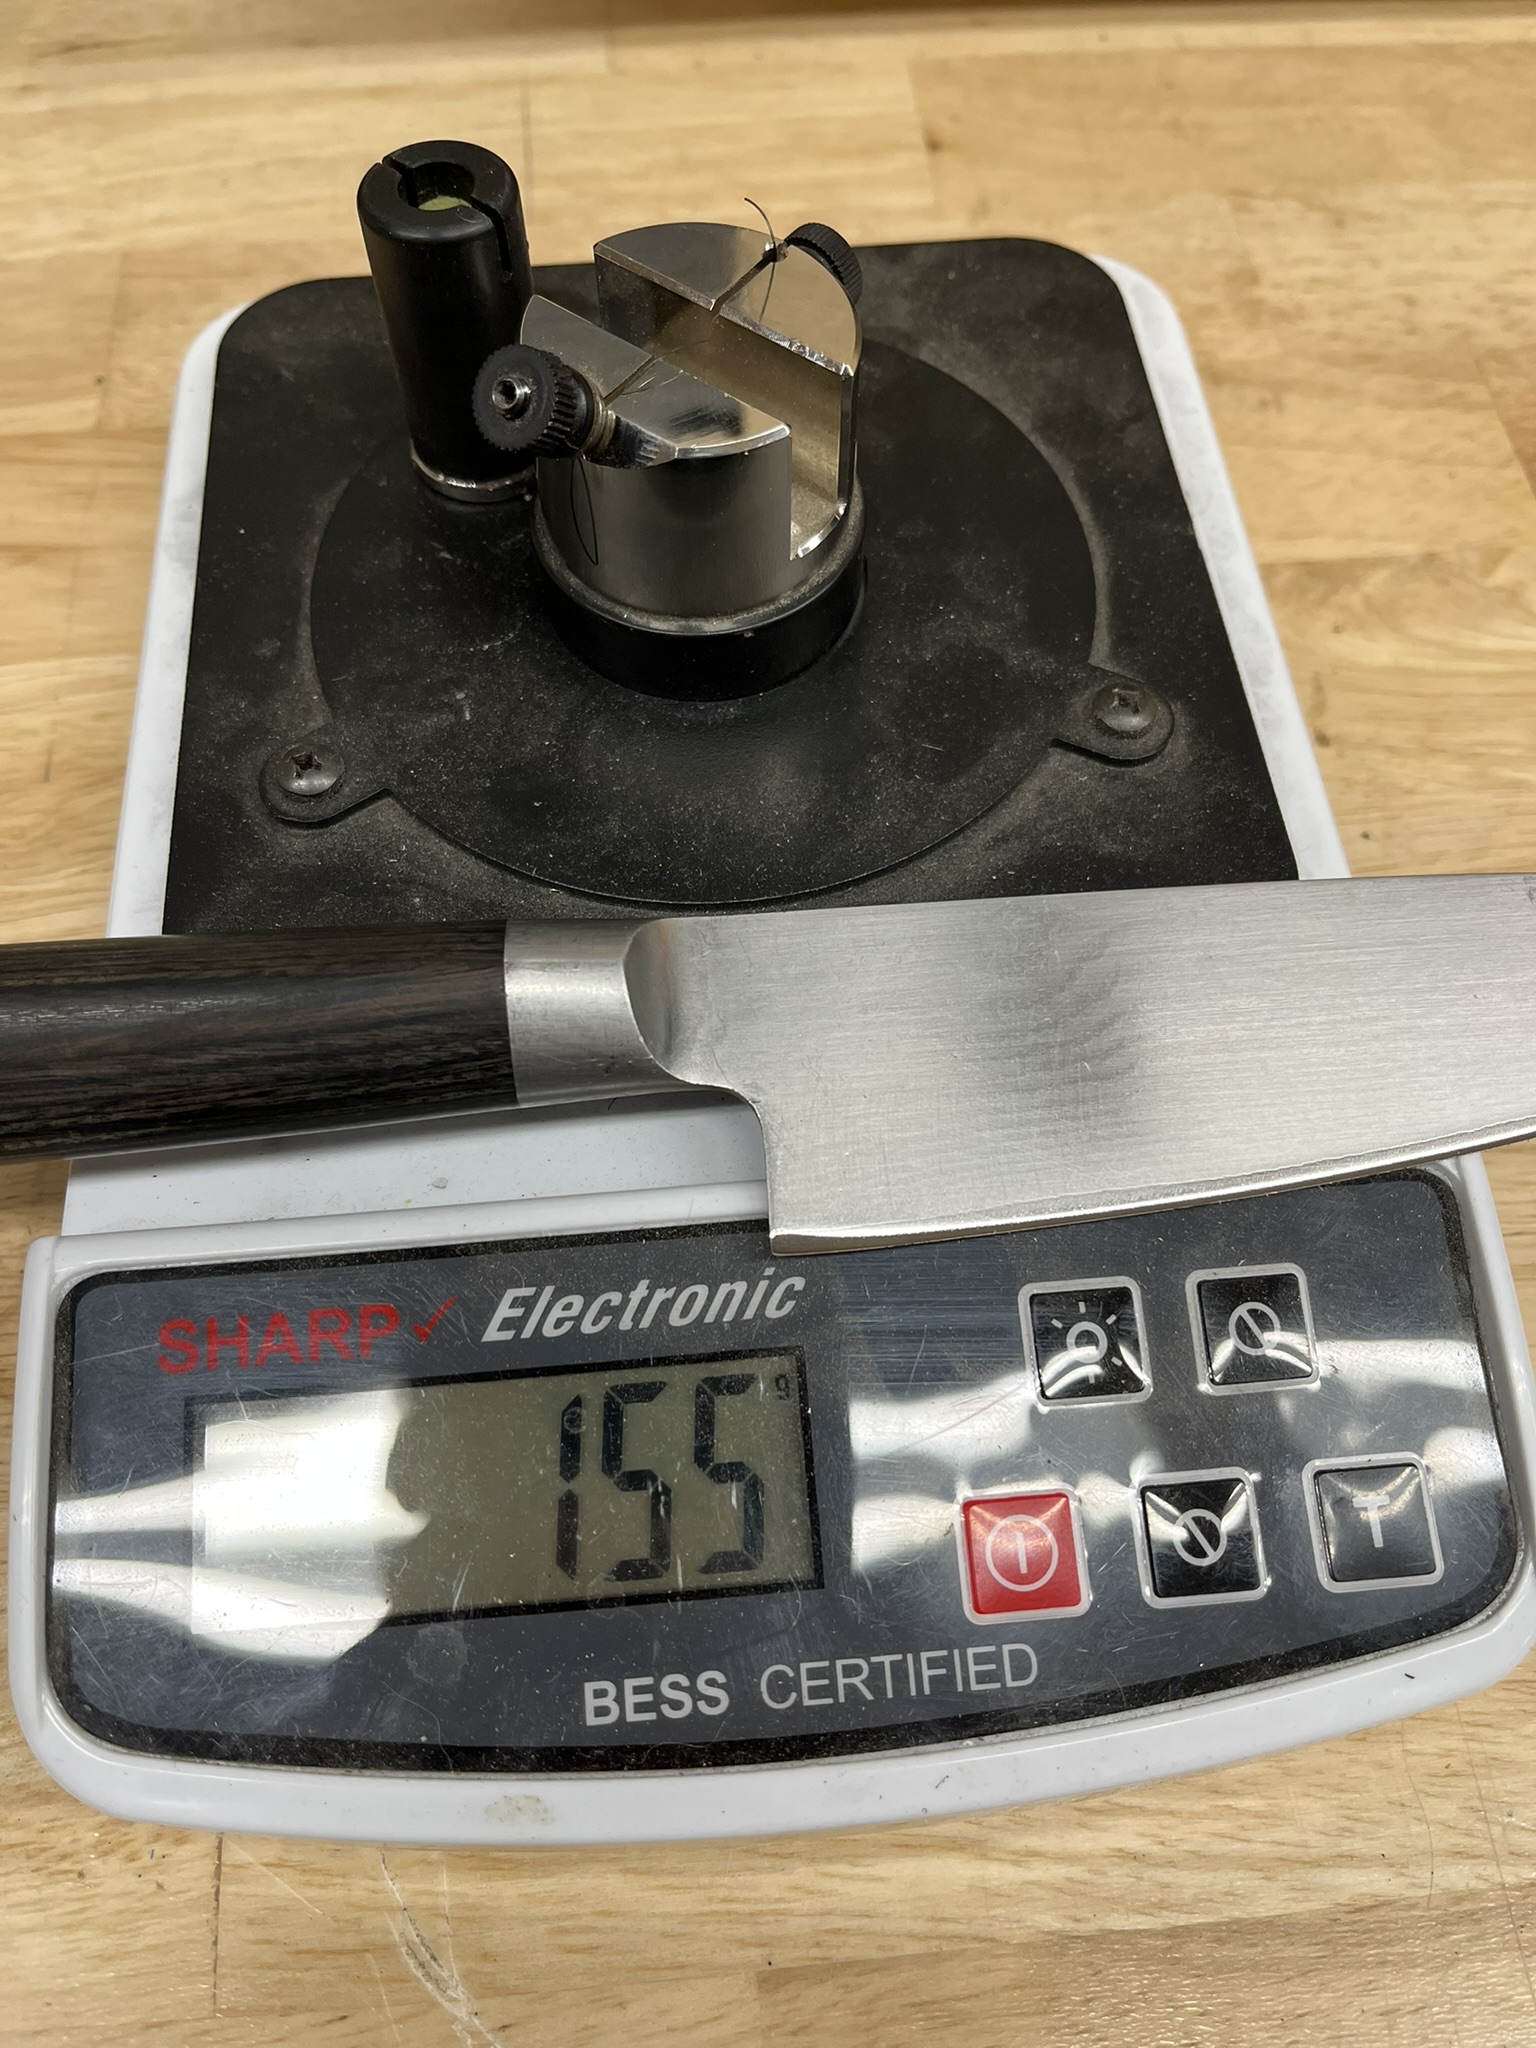
At each step, we'll show magnified images of the edge and quantify sharpness using our Edge-On-Up Edge Tester. This tool measures the amount of force needed to slice through a standardized testing medium, allowing us to assign a precise sharpness score that remains consistent across tests conducted days or even months apart. See our article on Assessing Sharpness for more on how we measure our results.
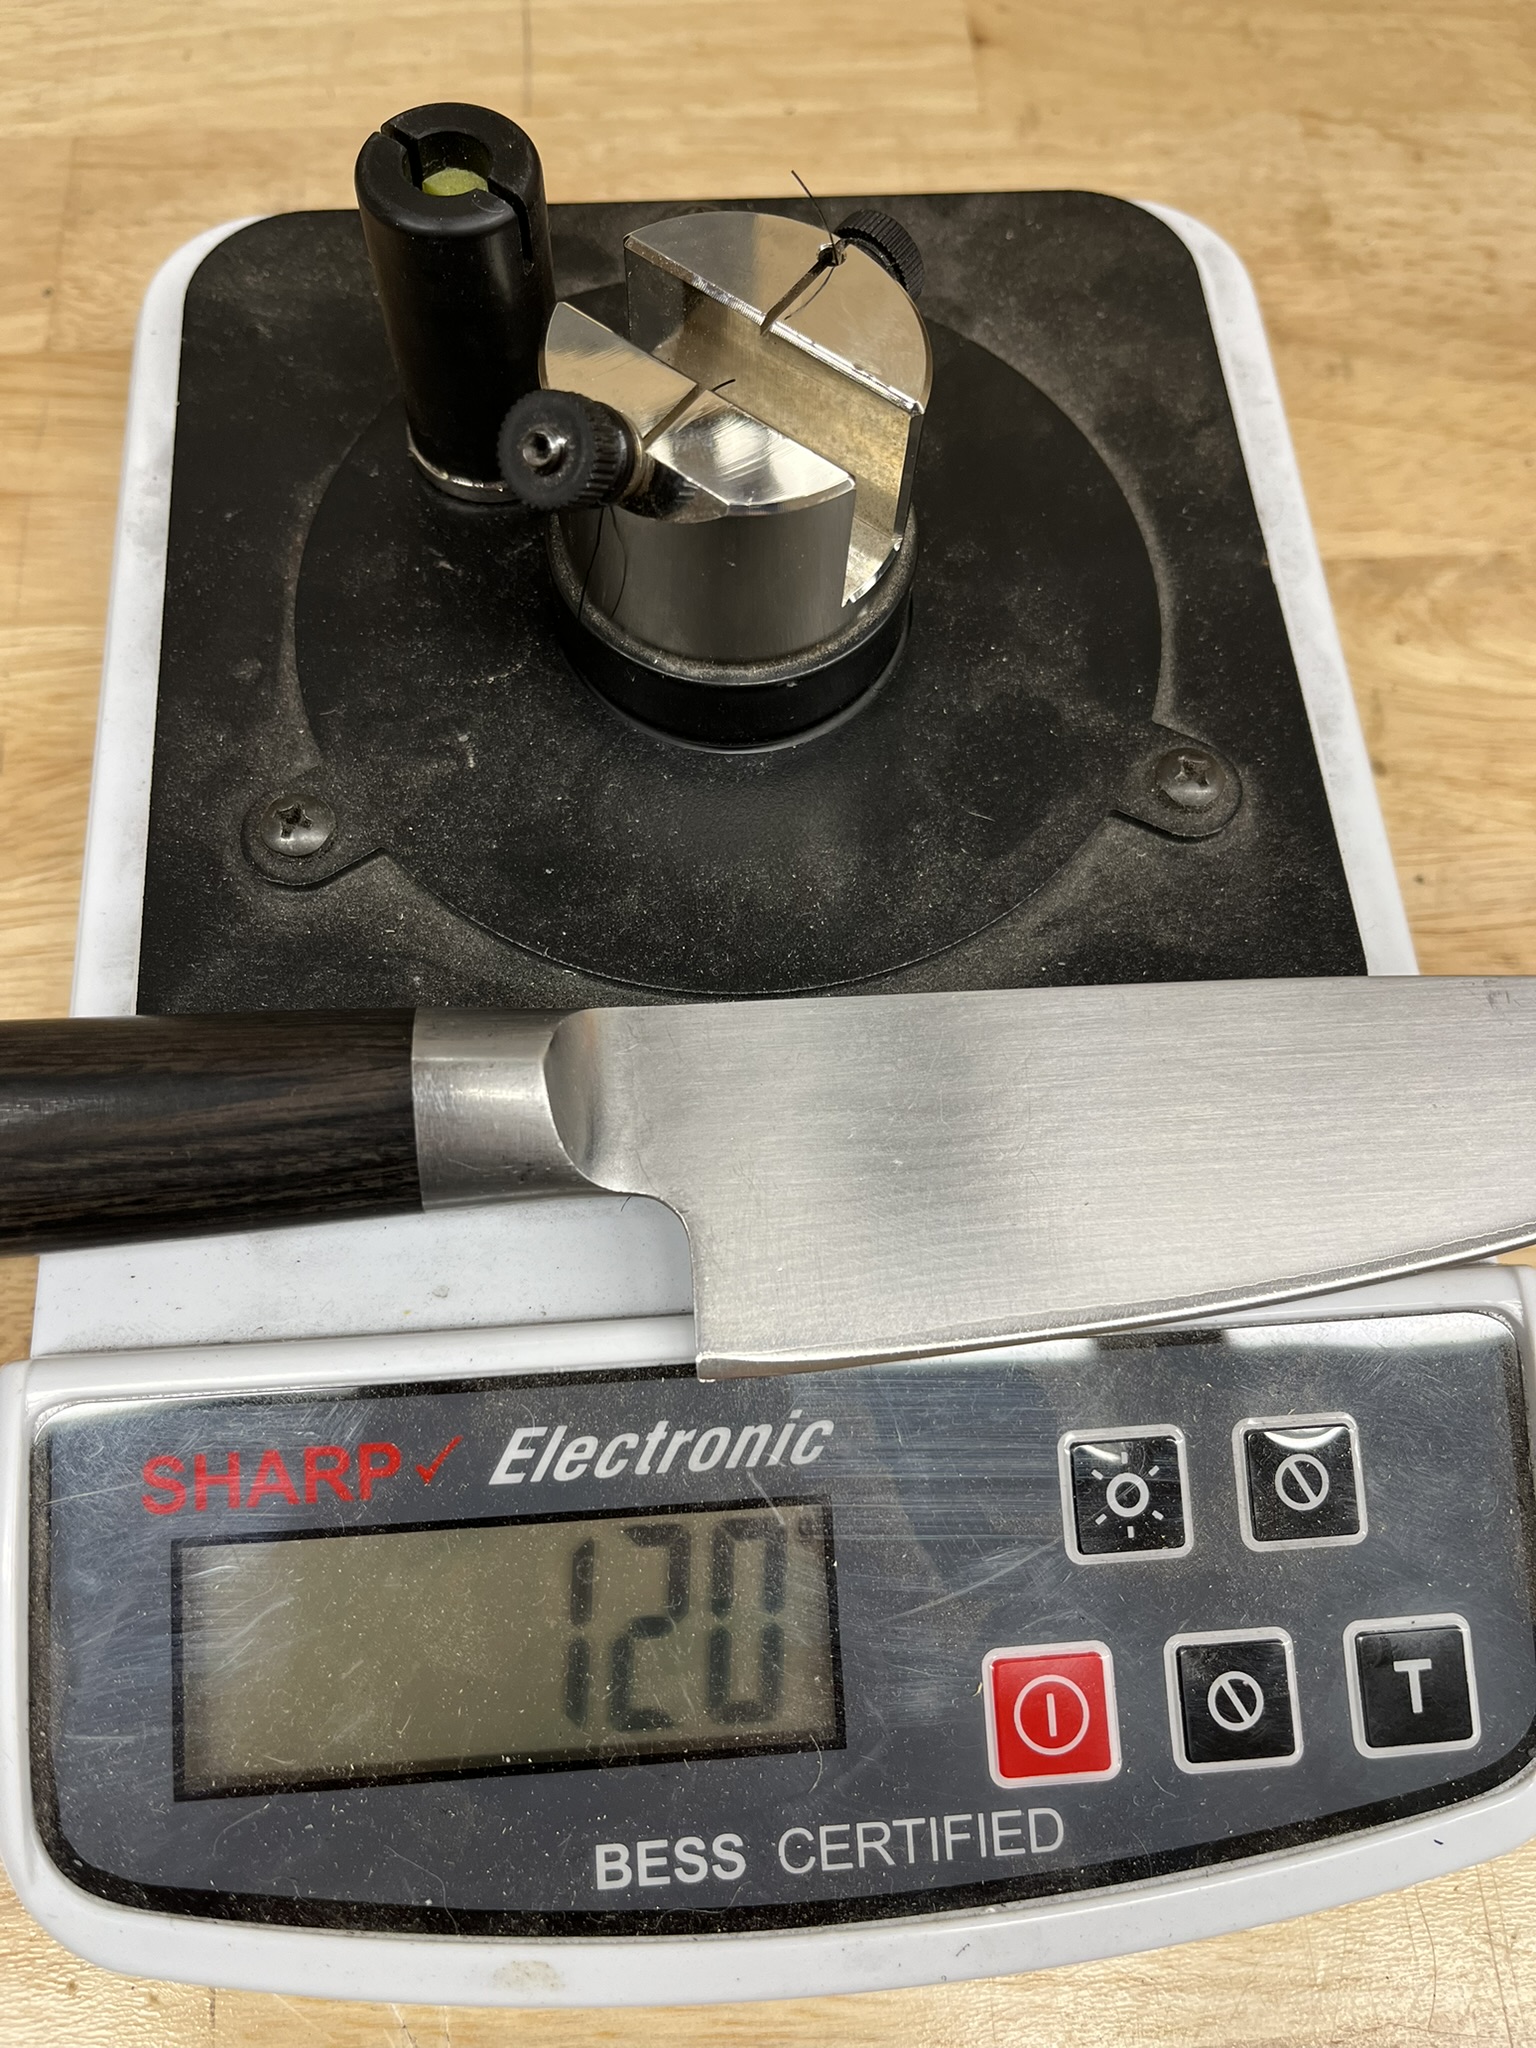
Starting Point:
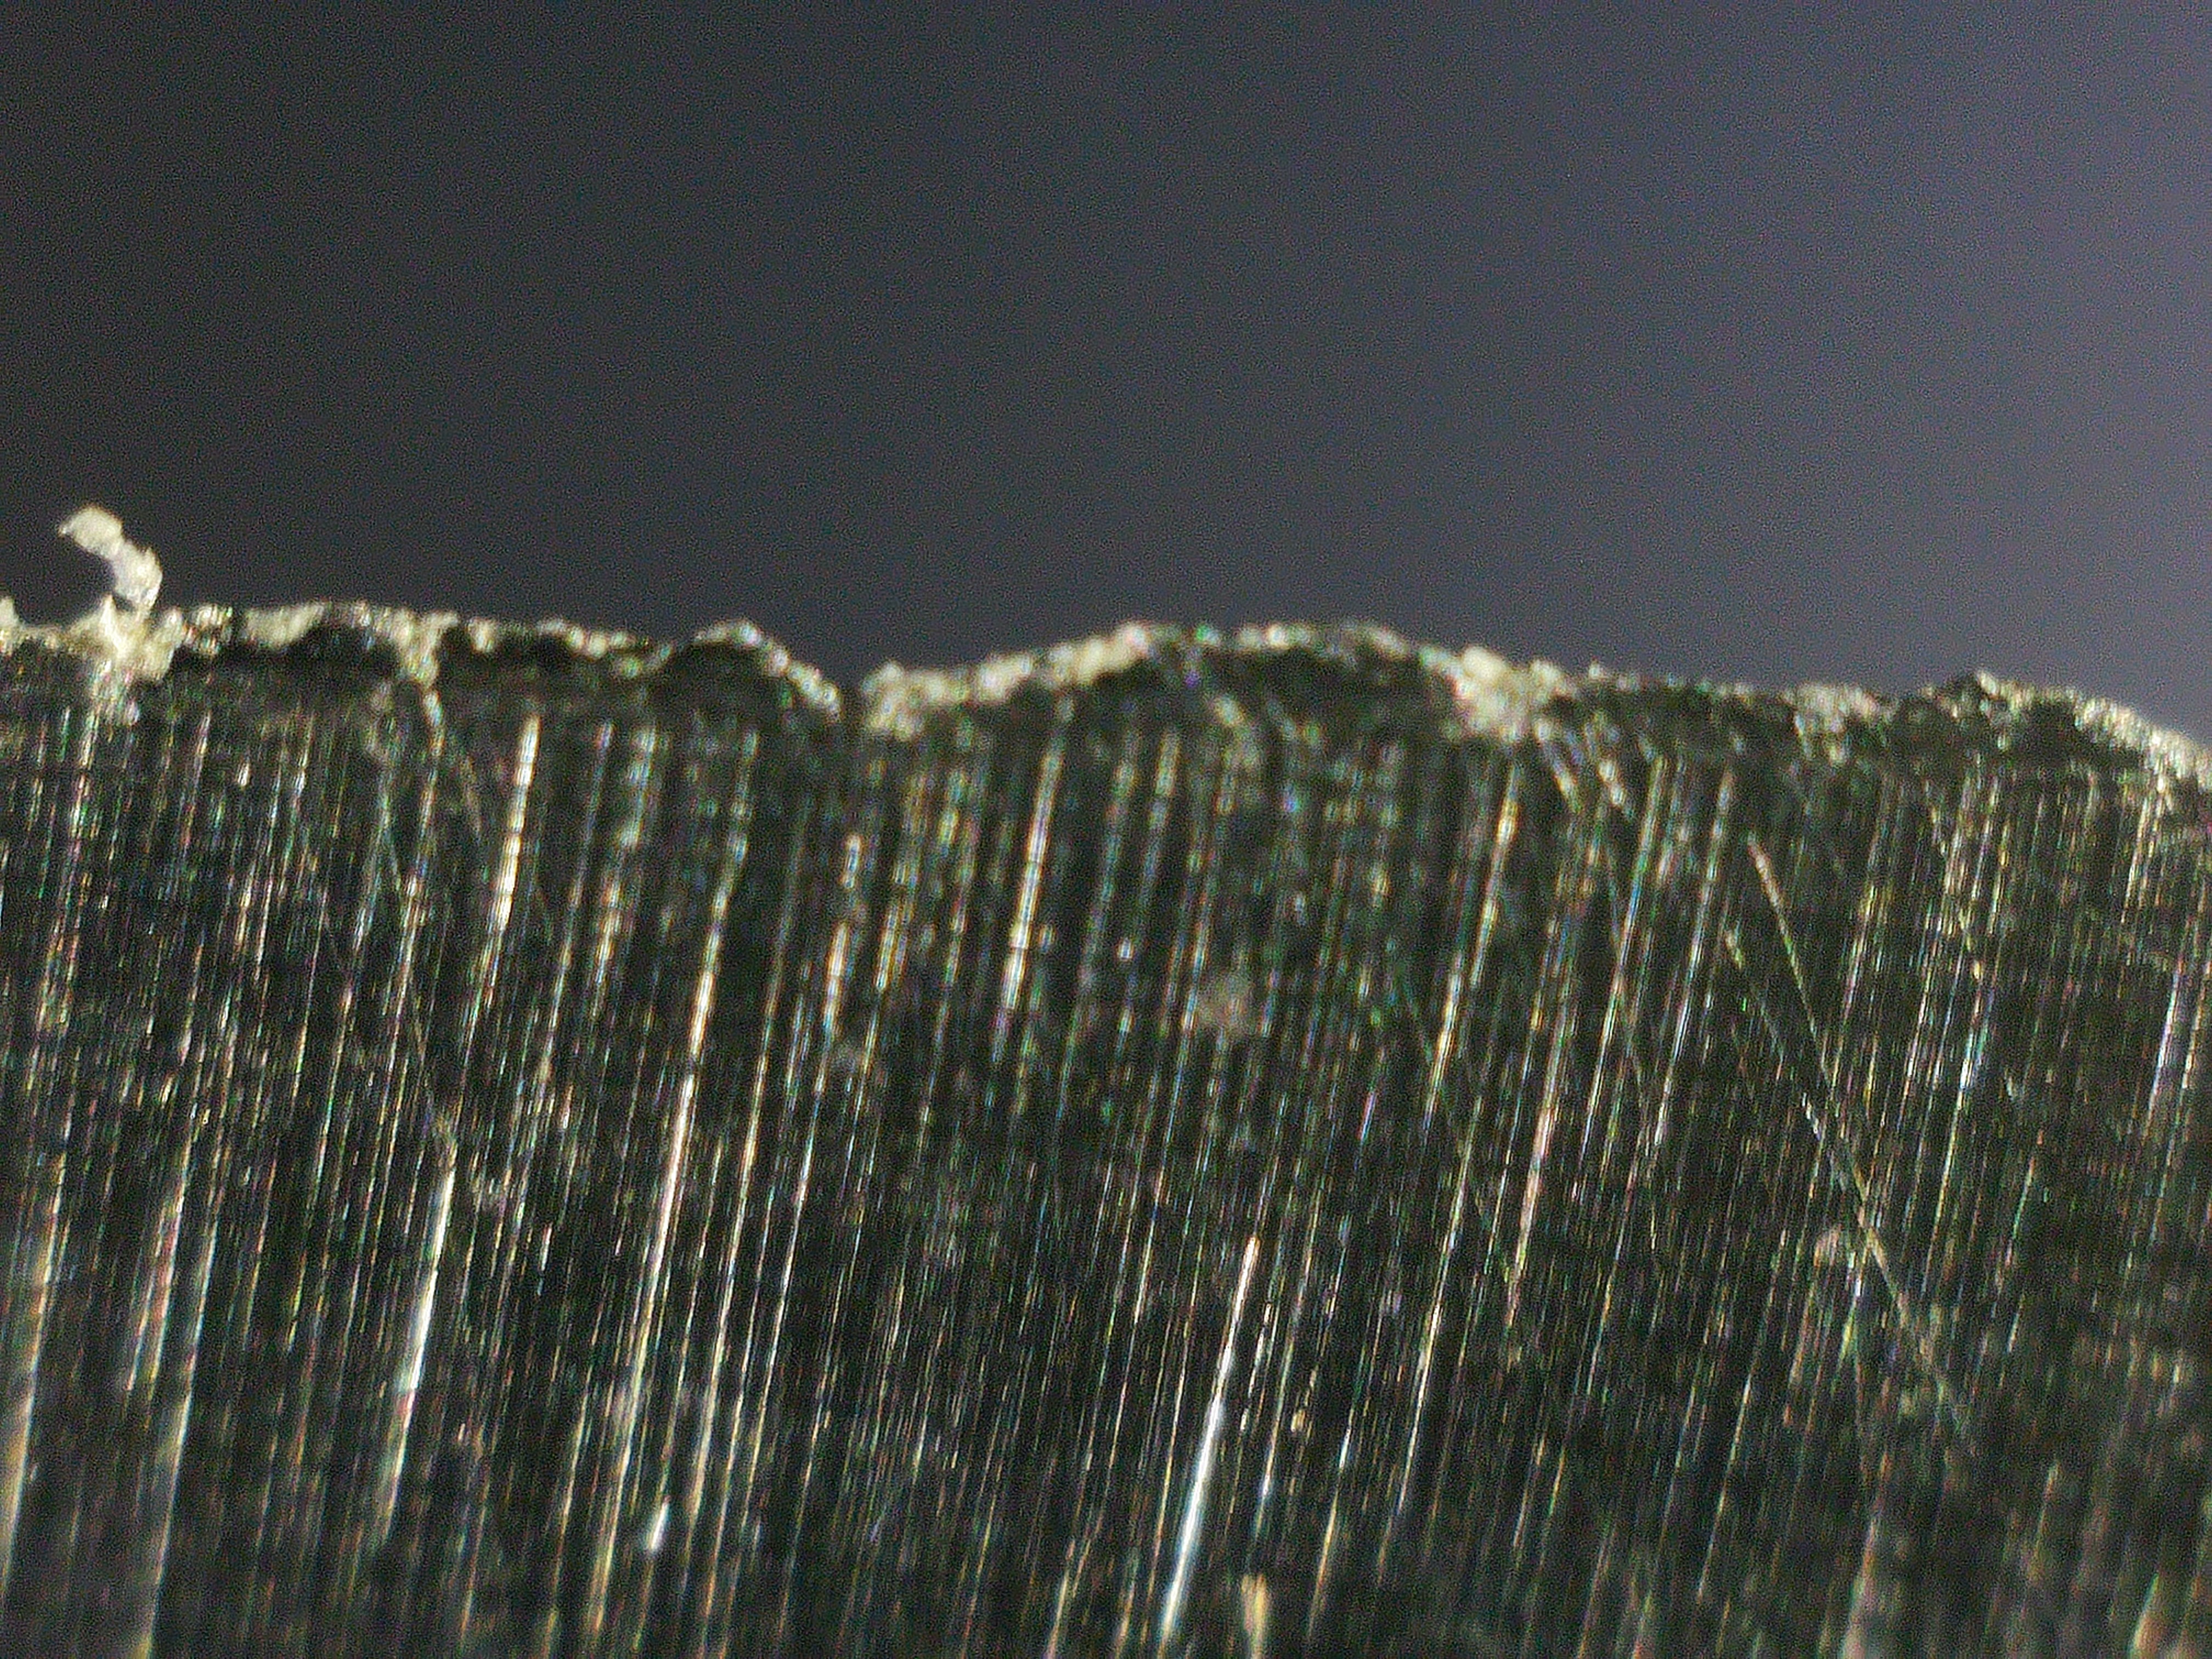
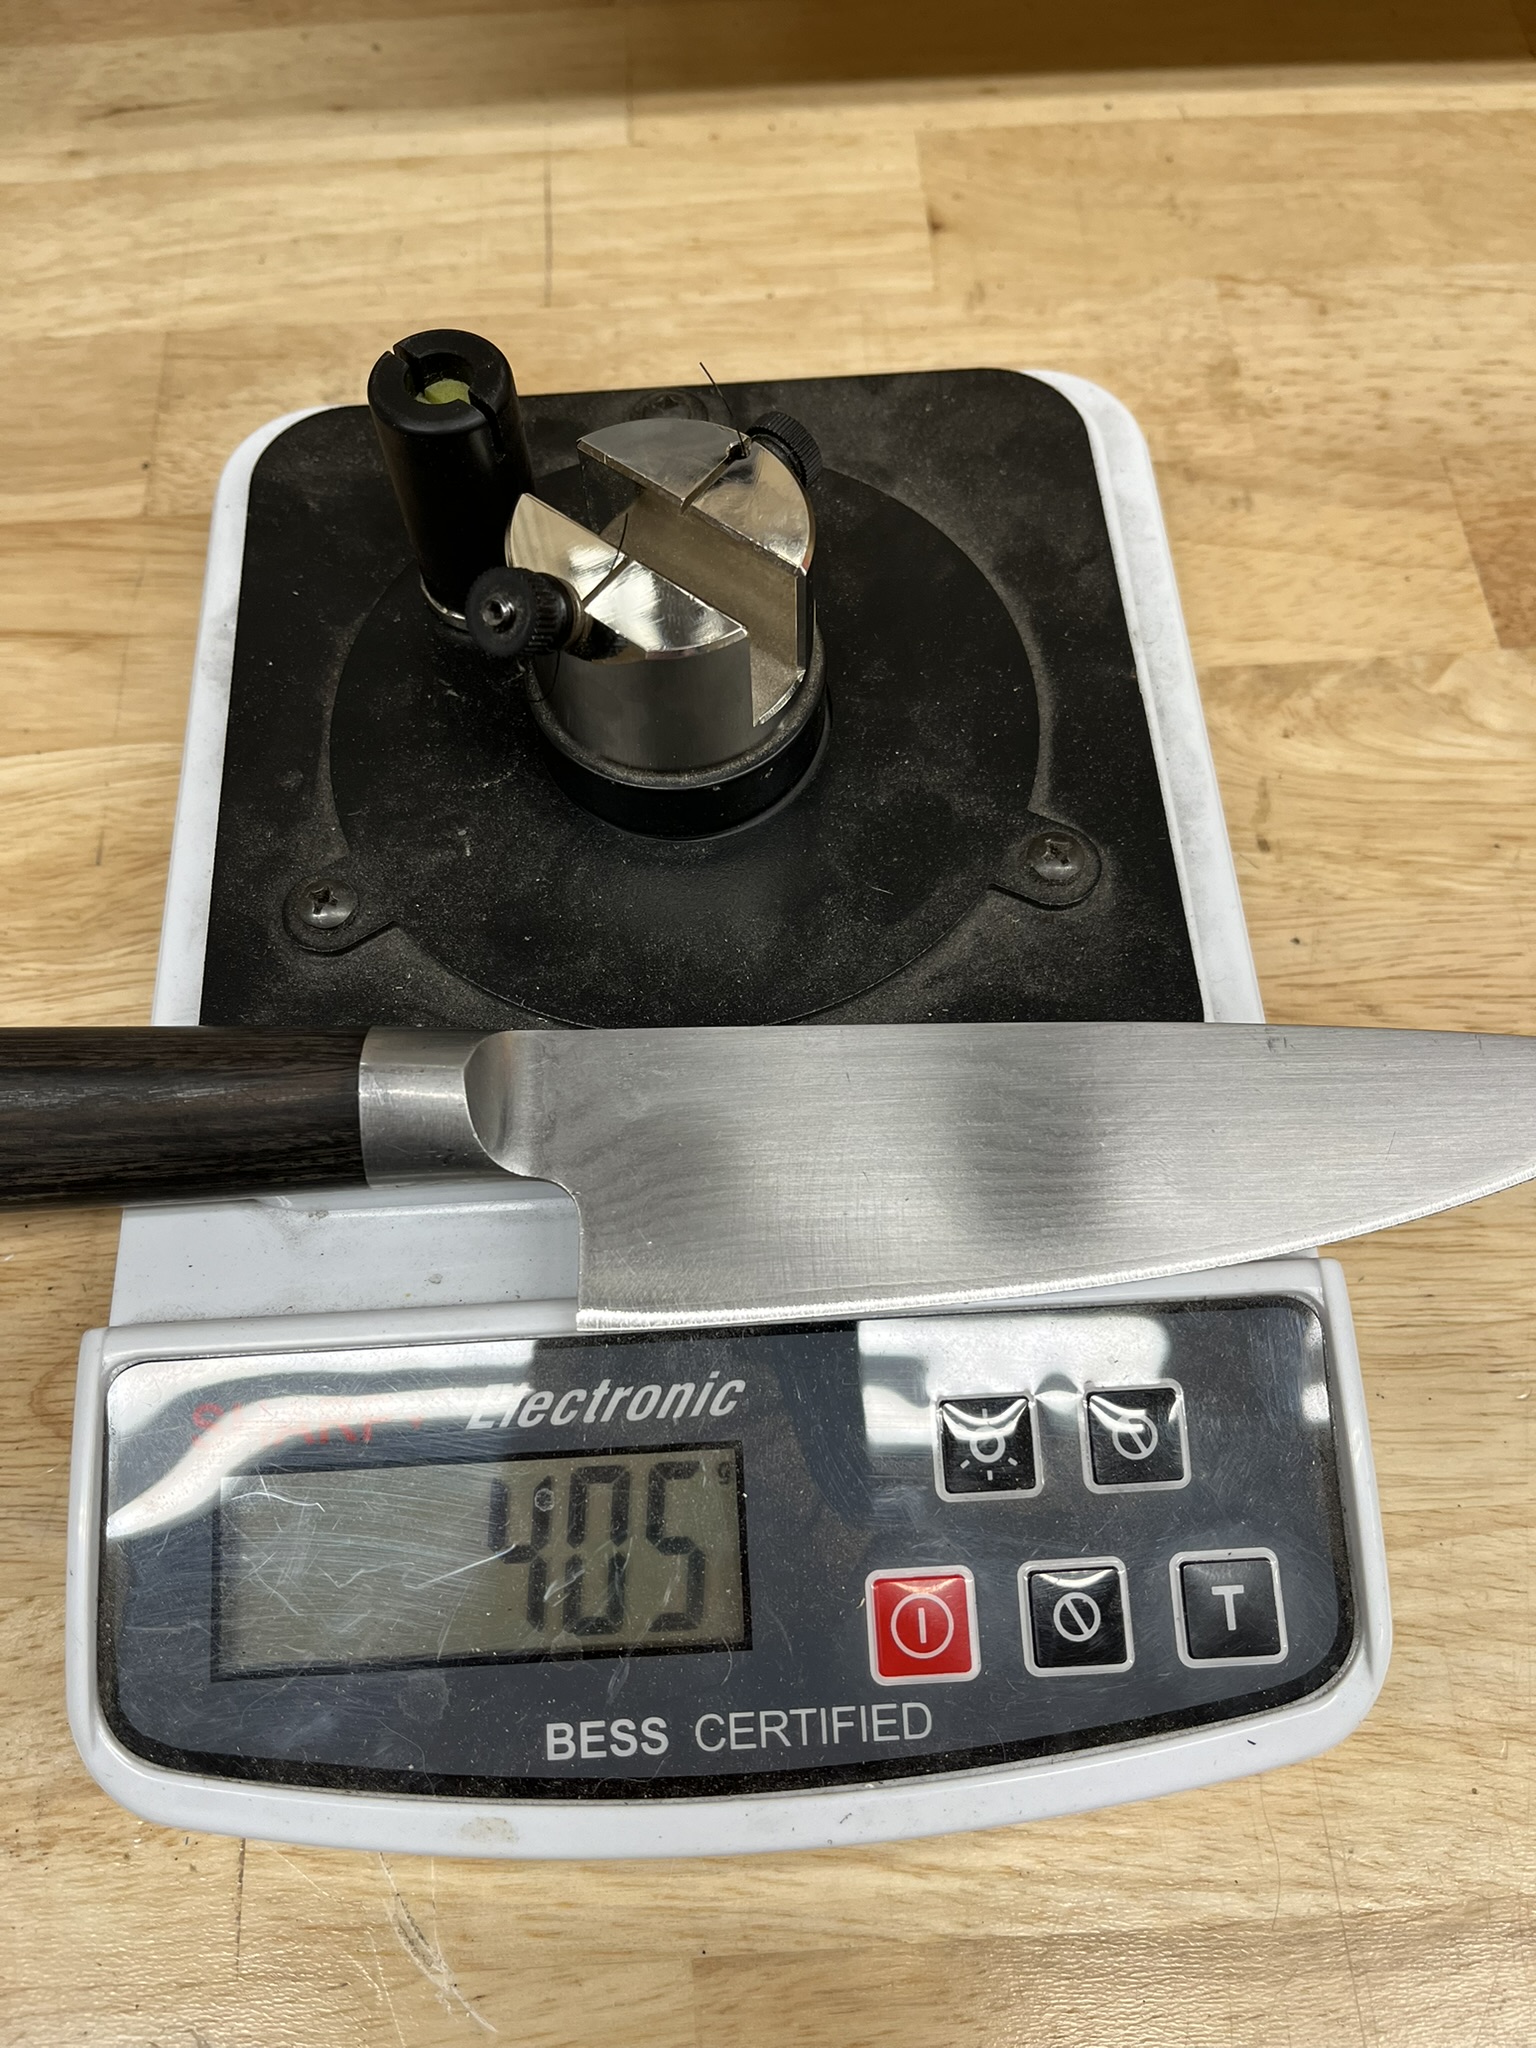
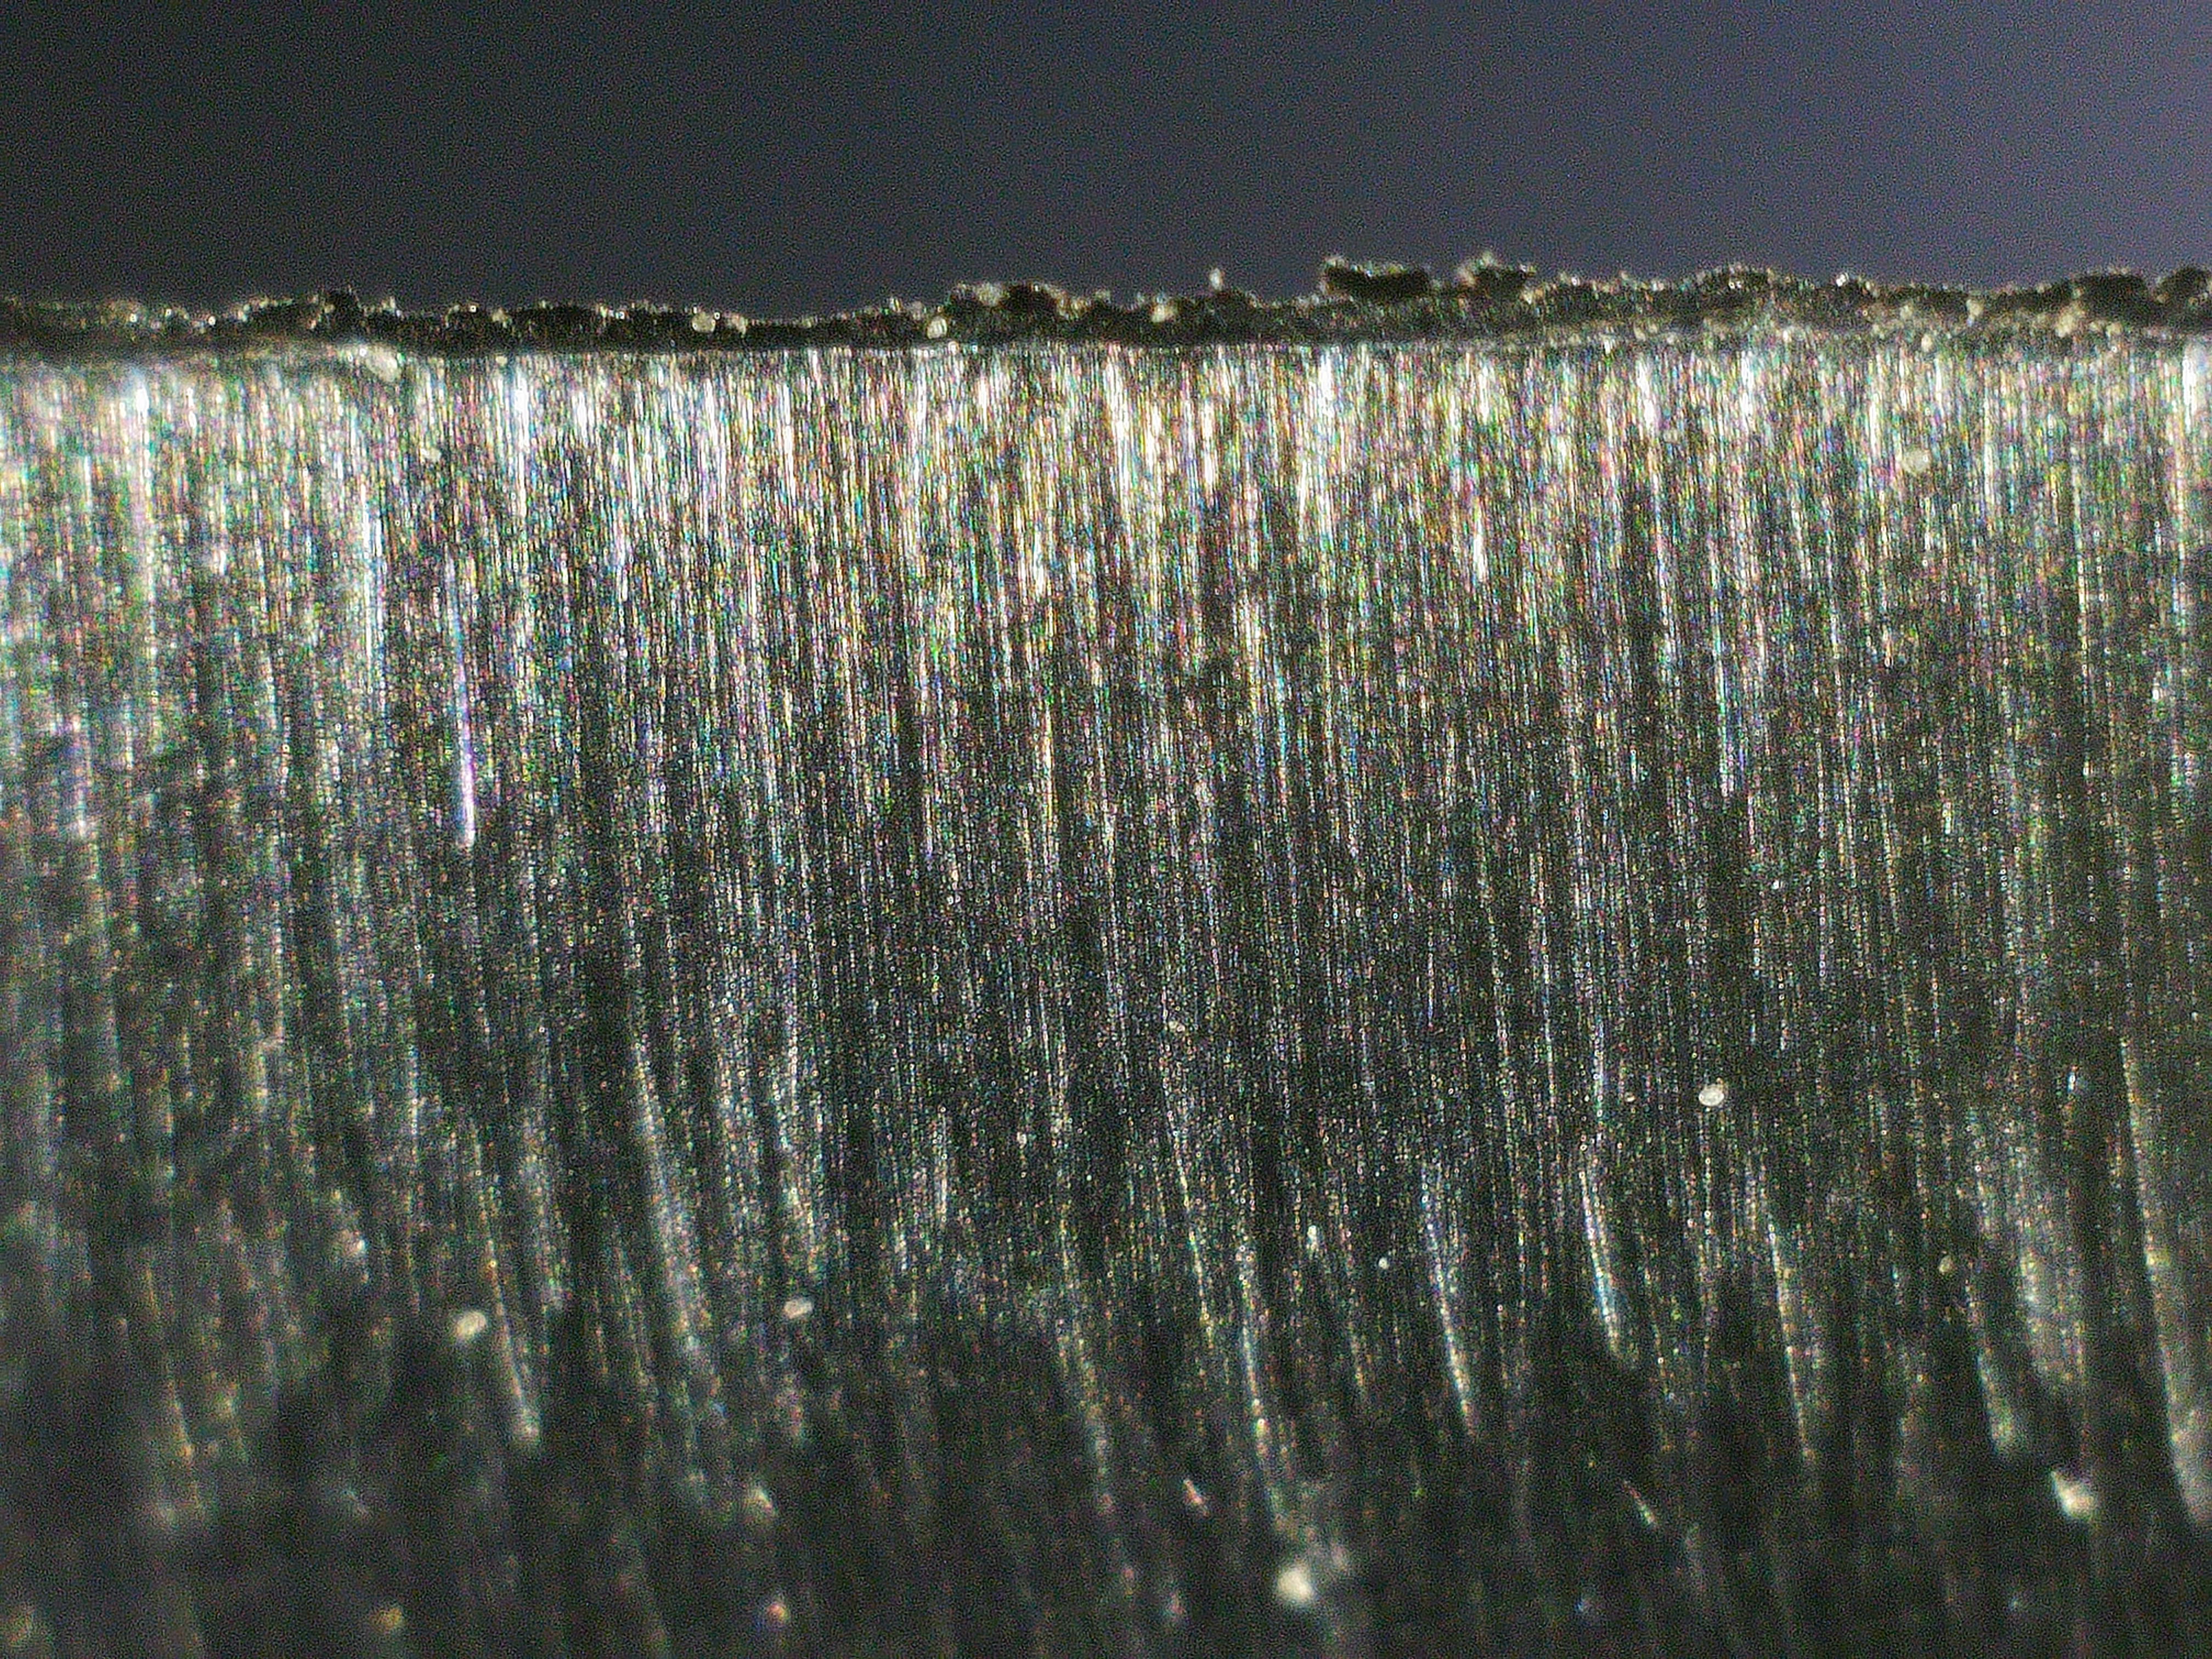
Before we start sharpening, we take an initial look at the edge. This particular knife has a visibly ragged edge—common for harder steels, which tend to chip rather than roll. By contrast, a softer Western knife would more likely have a rolled or rounded-over edge.
Our Edge-On-Up test confirms that this knife is quite dull, requiring 790 grams of force to cut through the test filament. While this is far from razor-sharp, it’s typical of what we see in the shop.
Step 1: Setting the Primary Bevel
We begin by regrinding the primary bevel with an 80-grit ceramic belt on our 1”x30” sander. It takes just two passes per side to remove the saw-toothed edge, but this stage leaves coarse scratch marks and a significant burr at the cutting edge.
Despite the rough finish, sharpness improves dramatically, with the knife now requiring roughly half the force it did before to cut through the test filament.
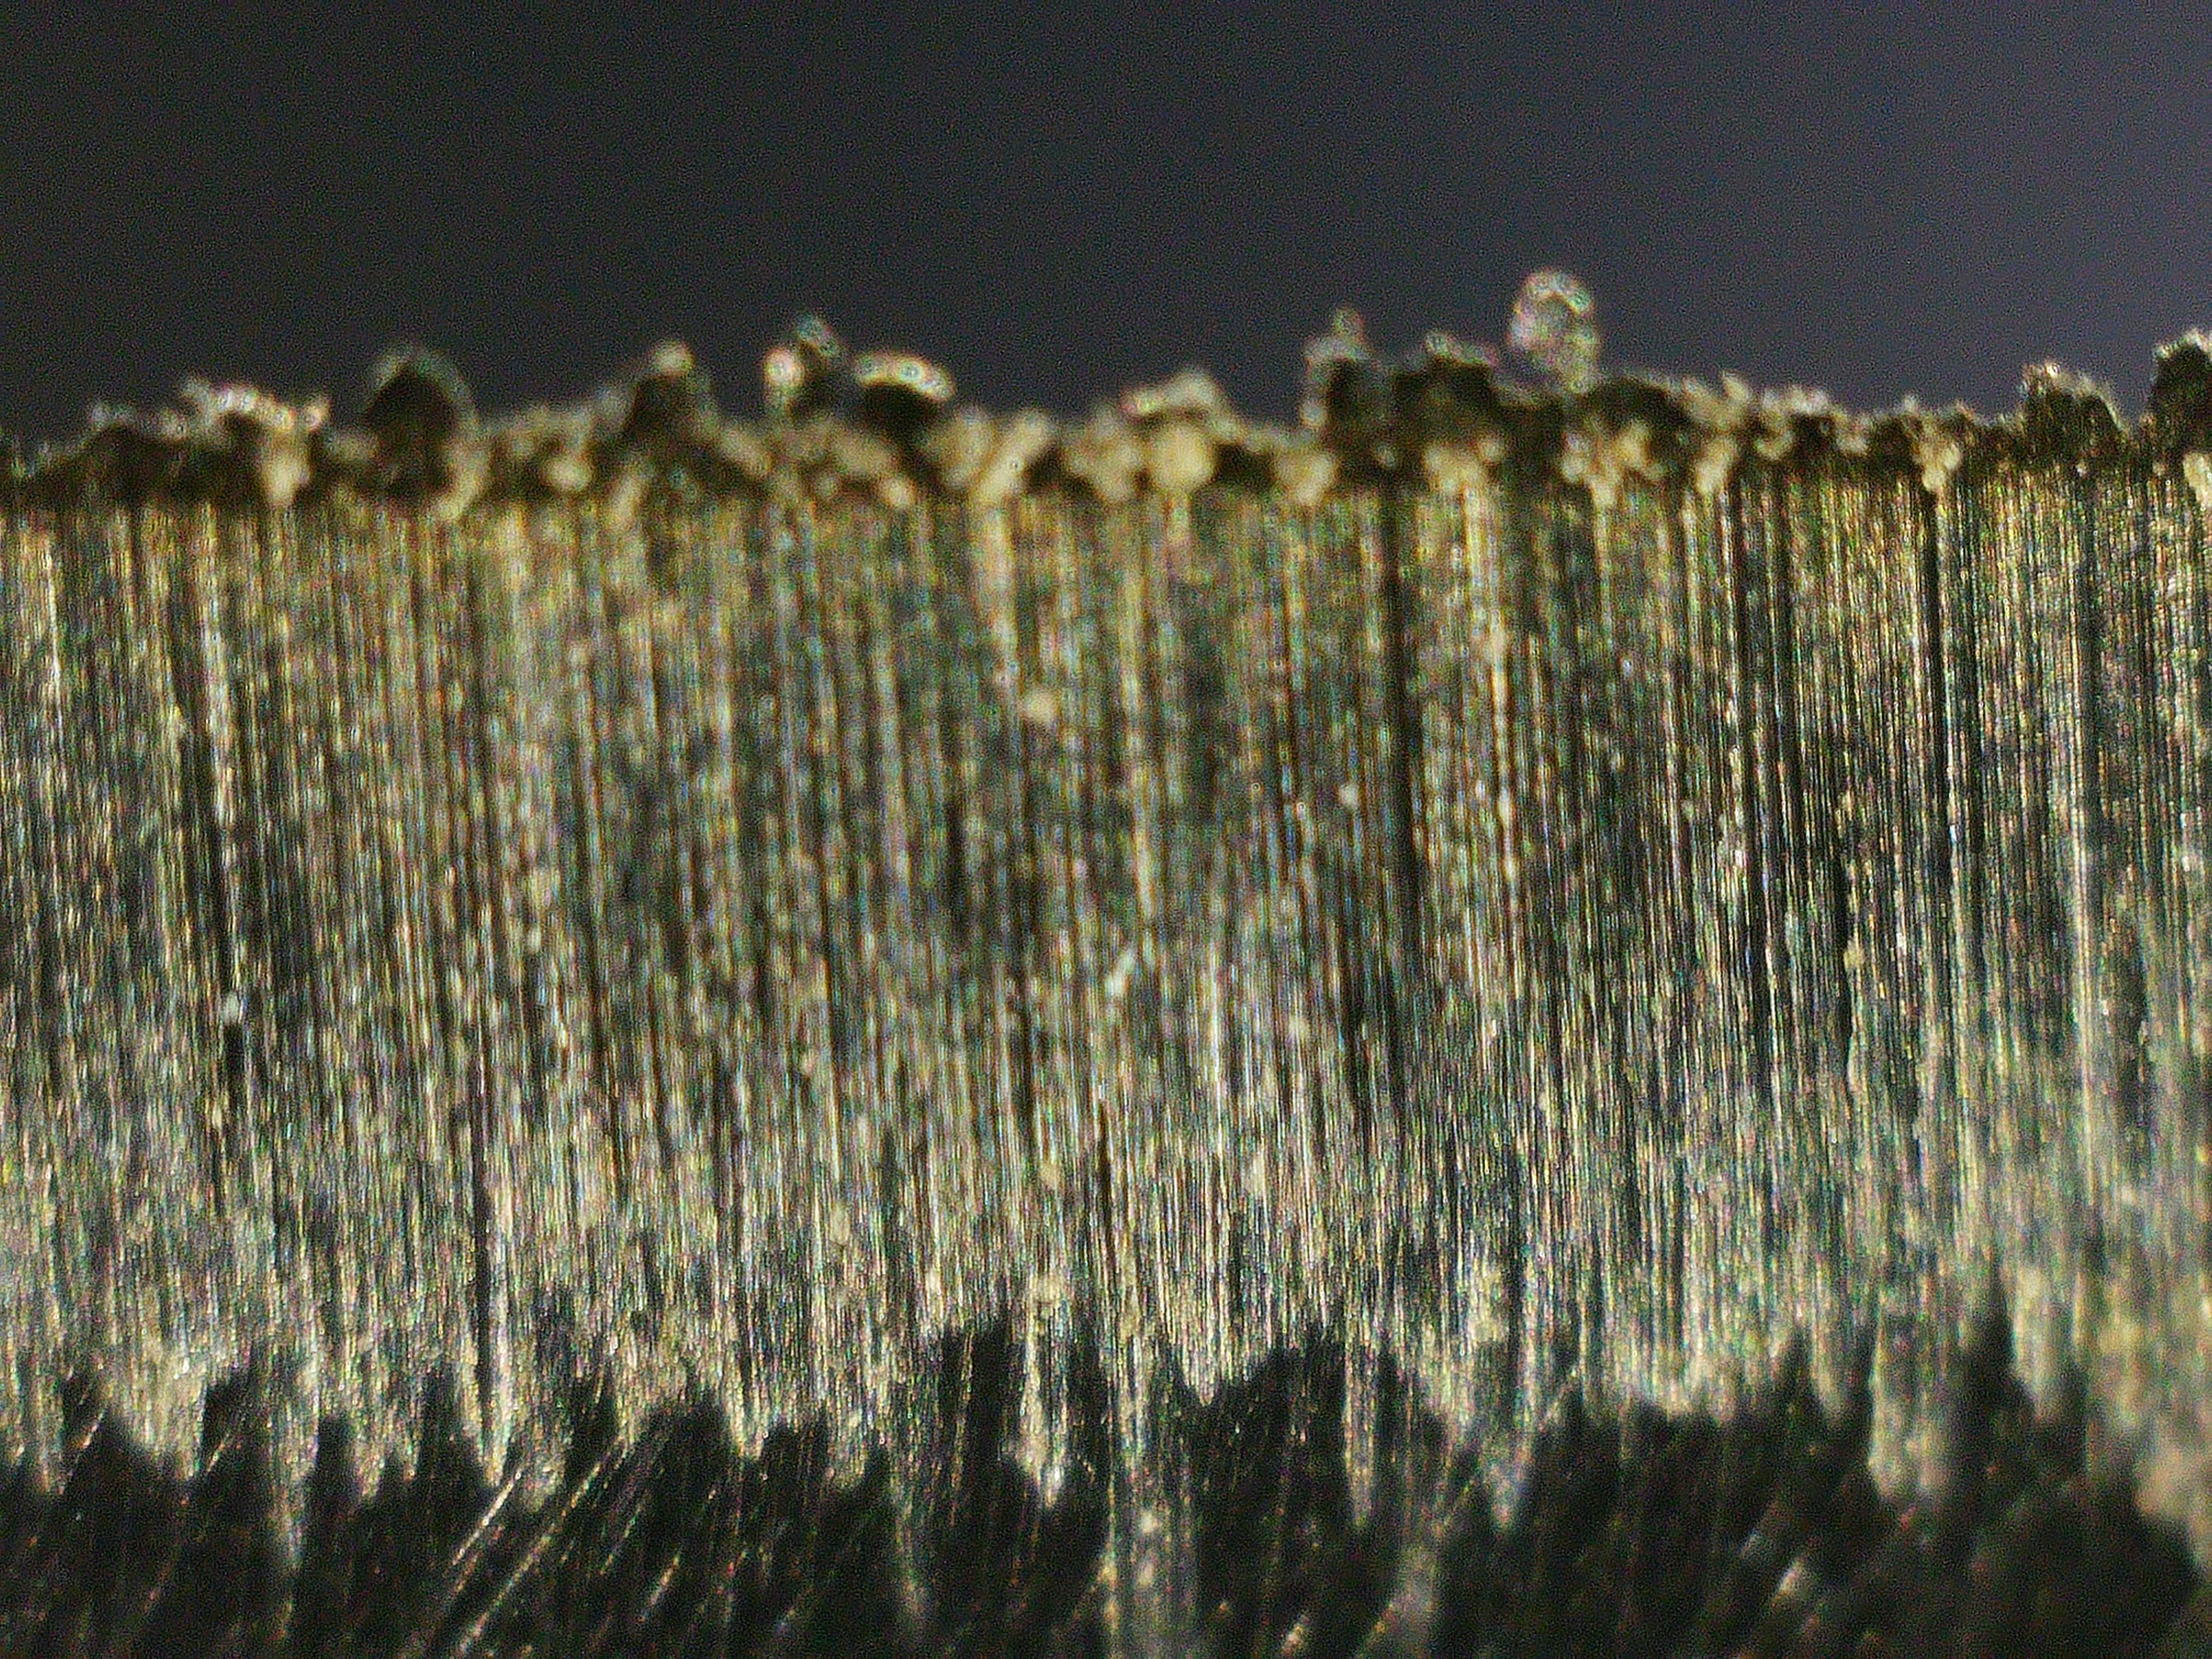
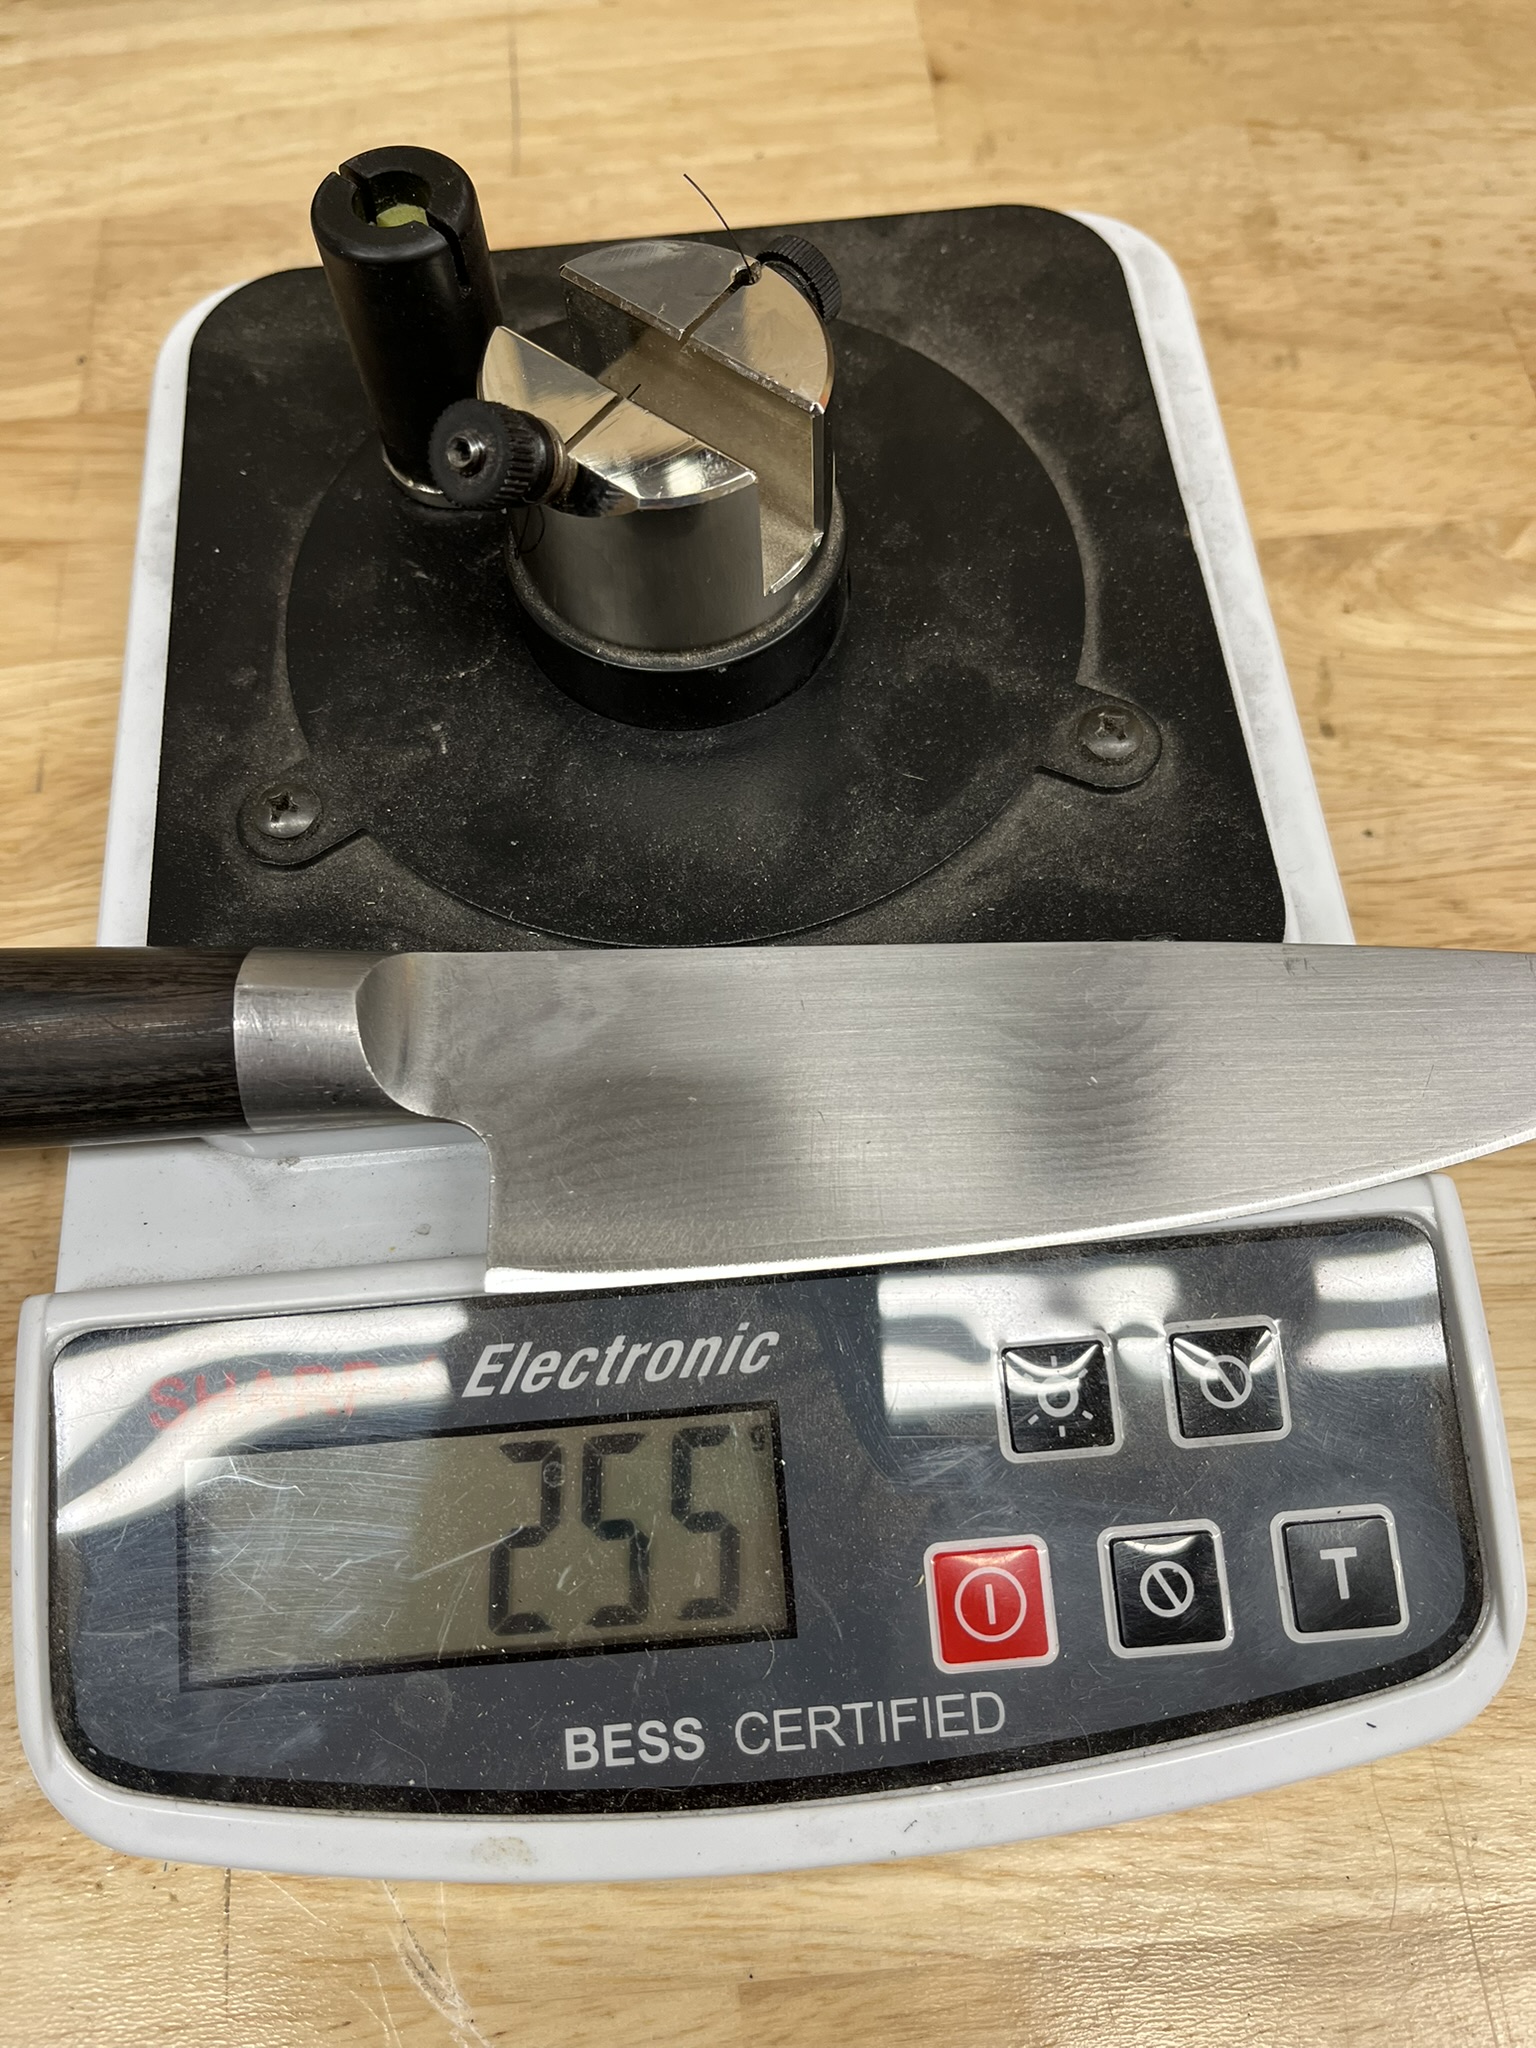
Step 2: Refining with Medium Grit
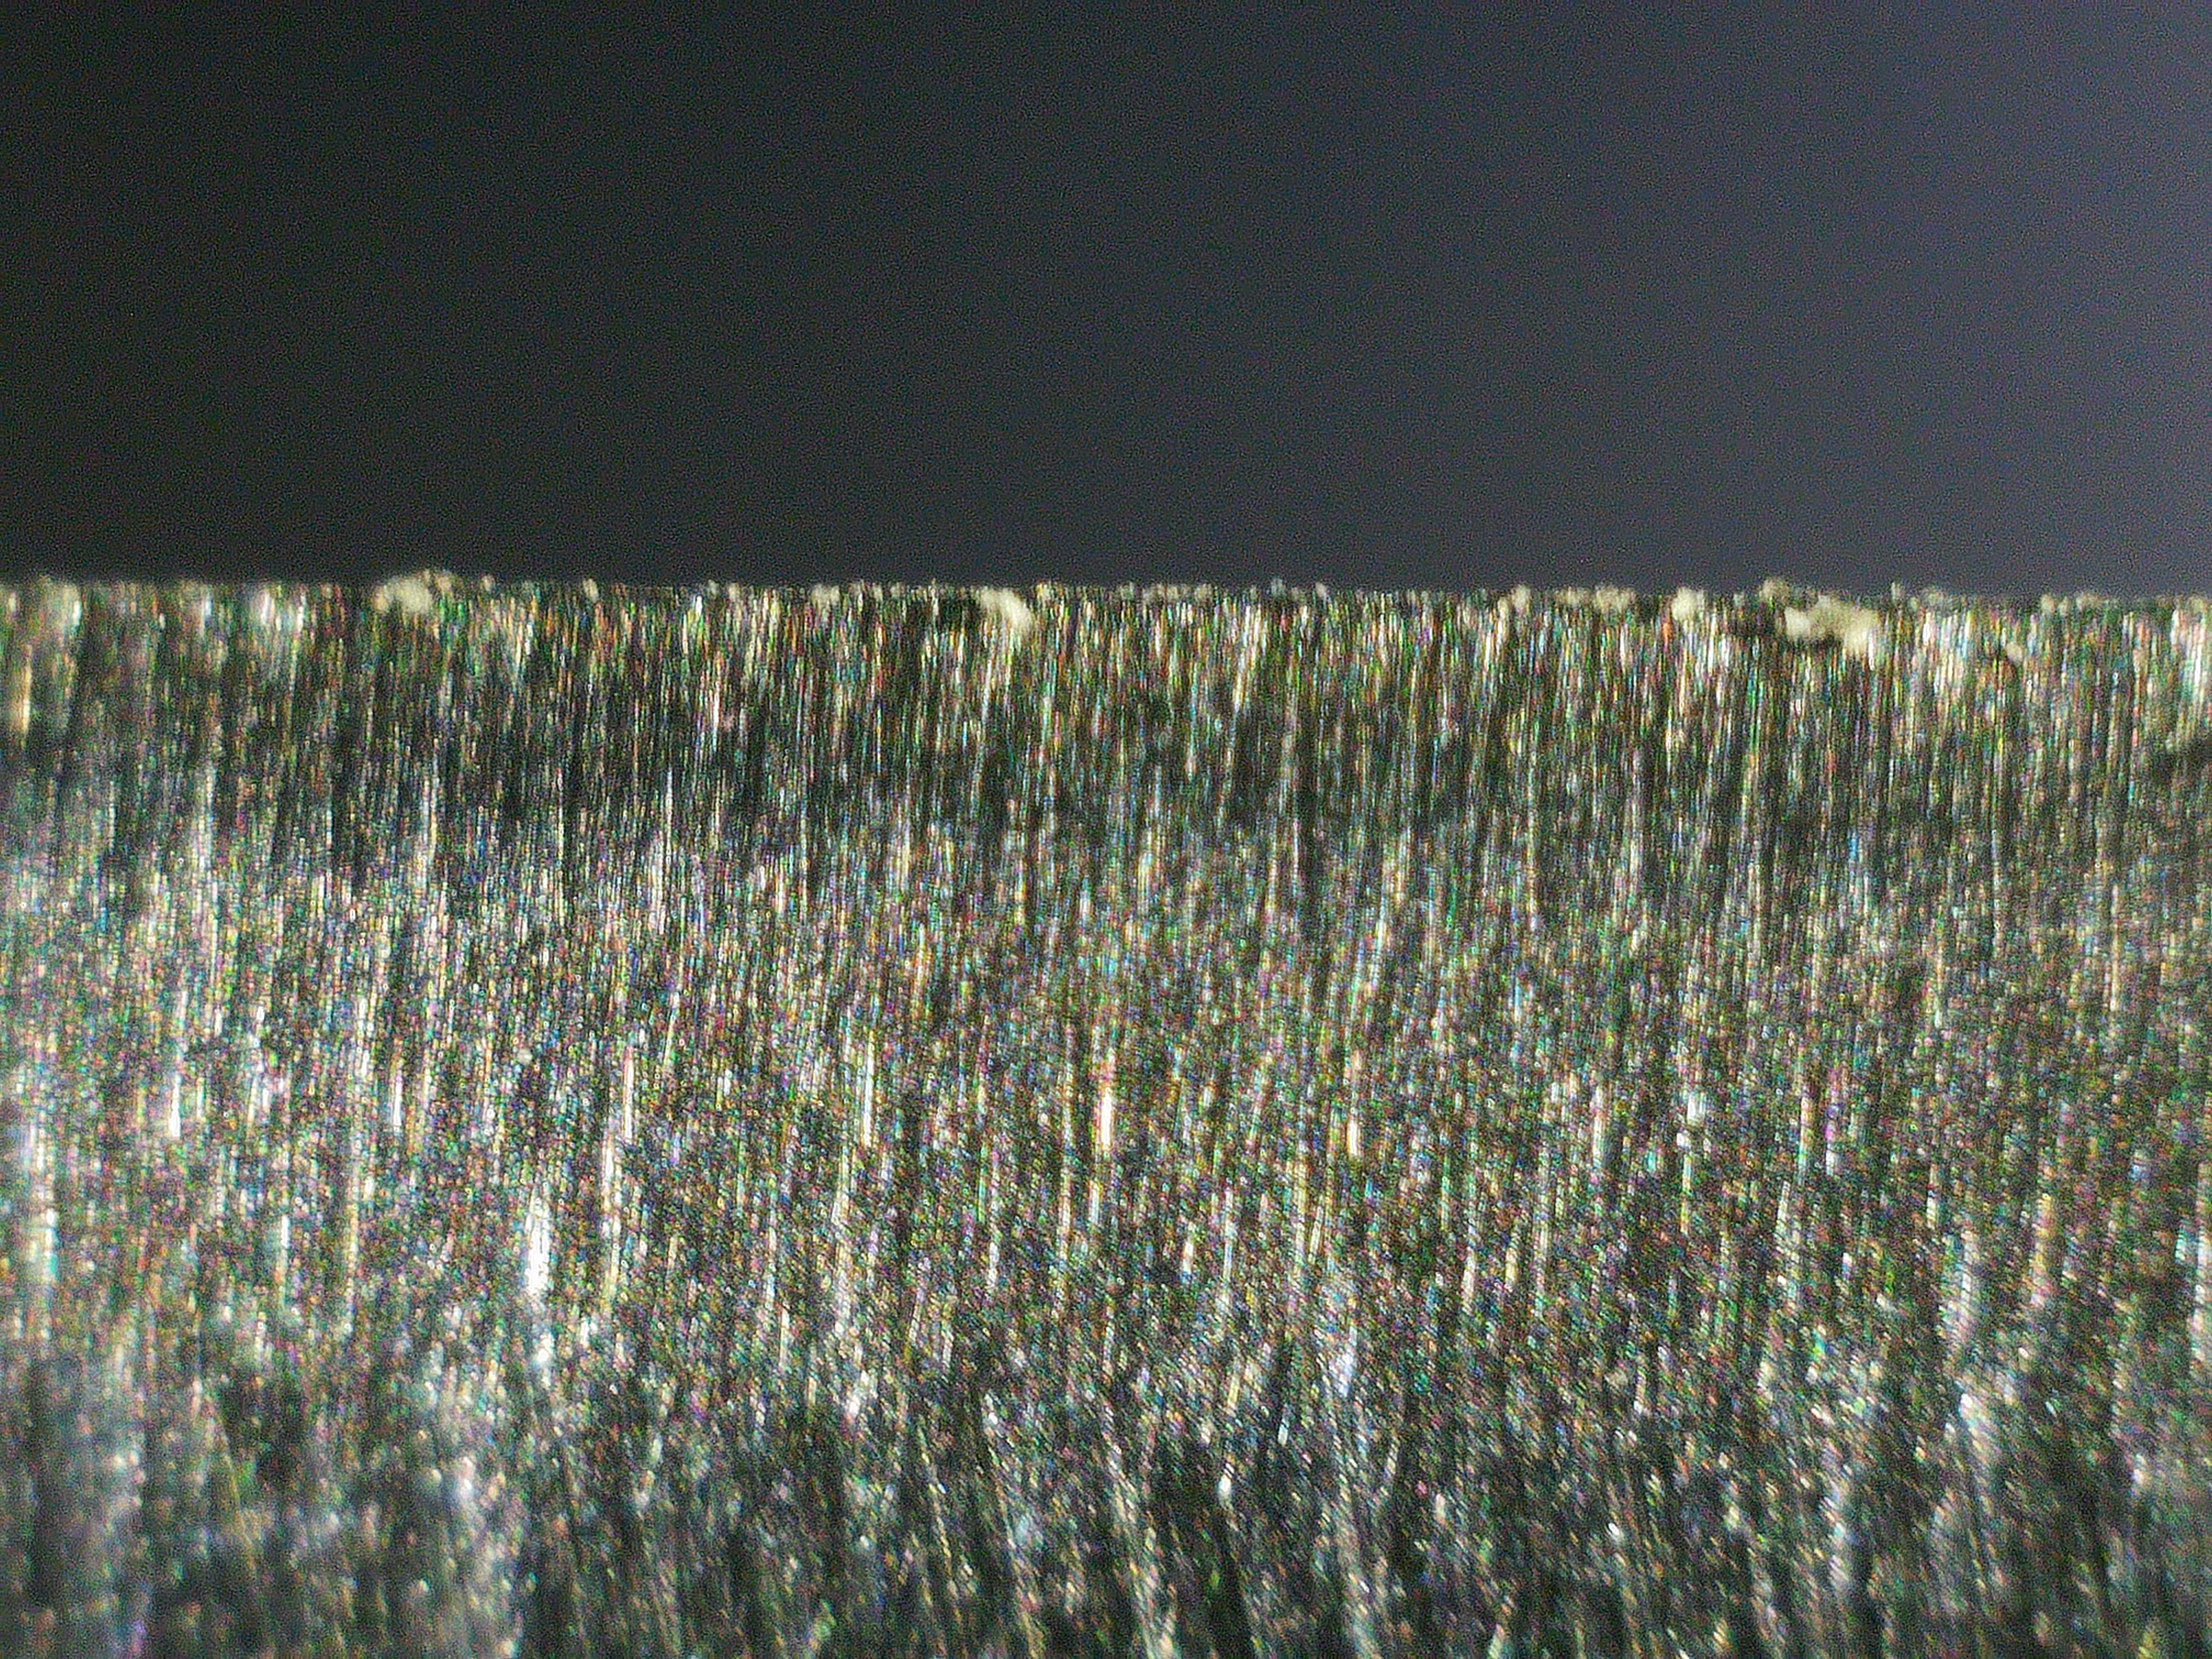
Next, we move to a 240-grit abrasive. The scratch marks become finer, but the burr is still quite pronounced. In the magnified image, you can see the burr as a darker, jagged strip along the cutting edge.
Sharpness improves further, with the knife now requiring 255 grams of force to cut the test filament. At this stage, the knife would already perform well in most kitchen tasks.
Step 3: Fine Grit Sanding
We refine the edge further using a 600-grit silicon carbide abrasive. By now, the scratch marks are significantly finer, and the burr is much smaller and more uniform.
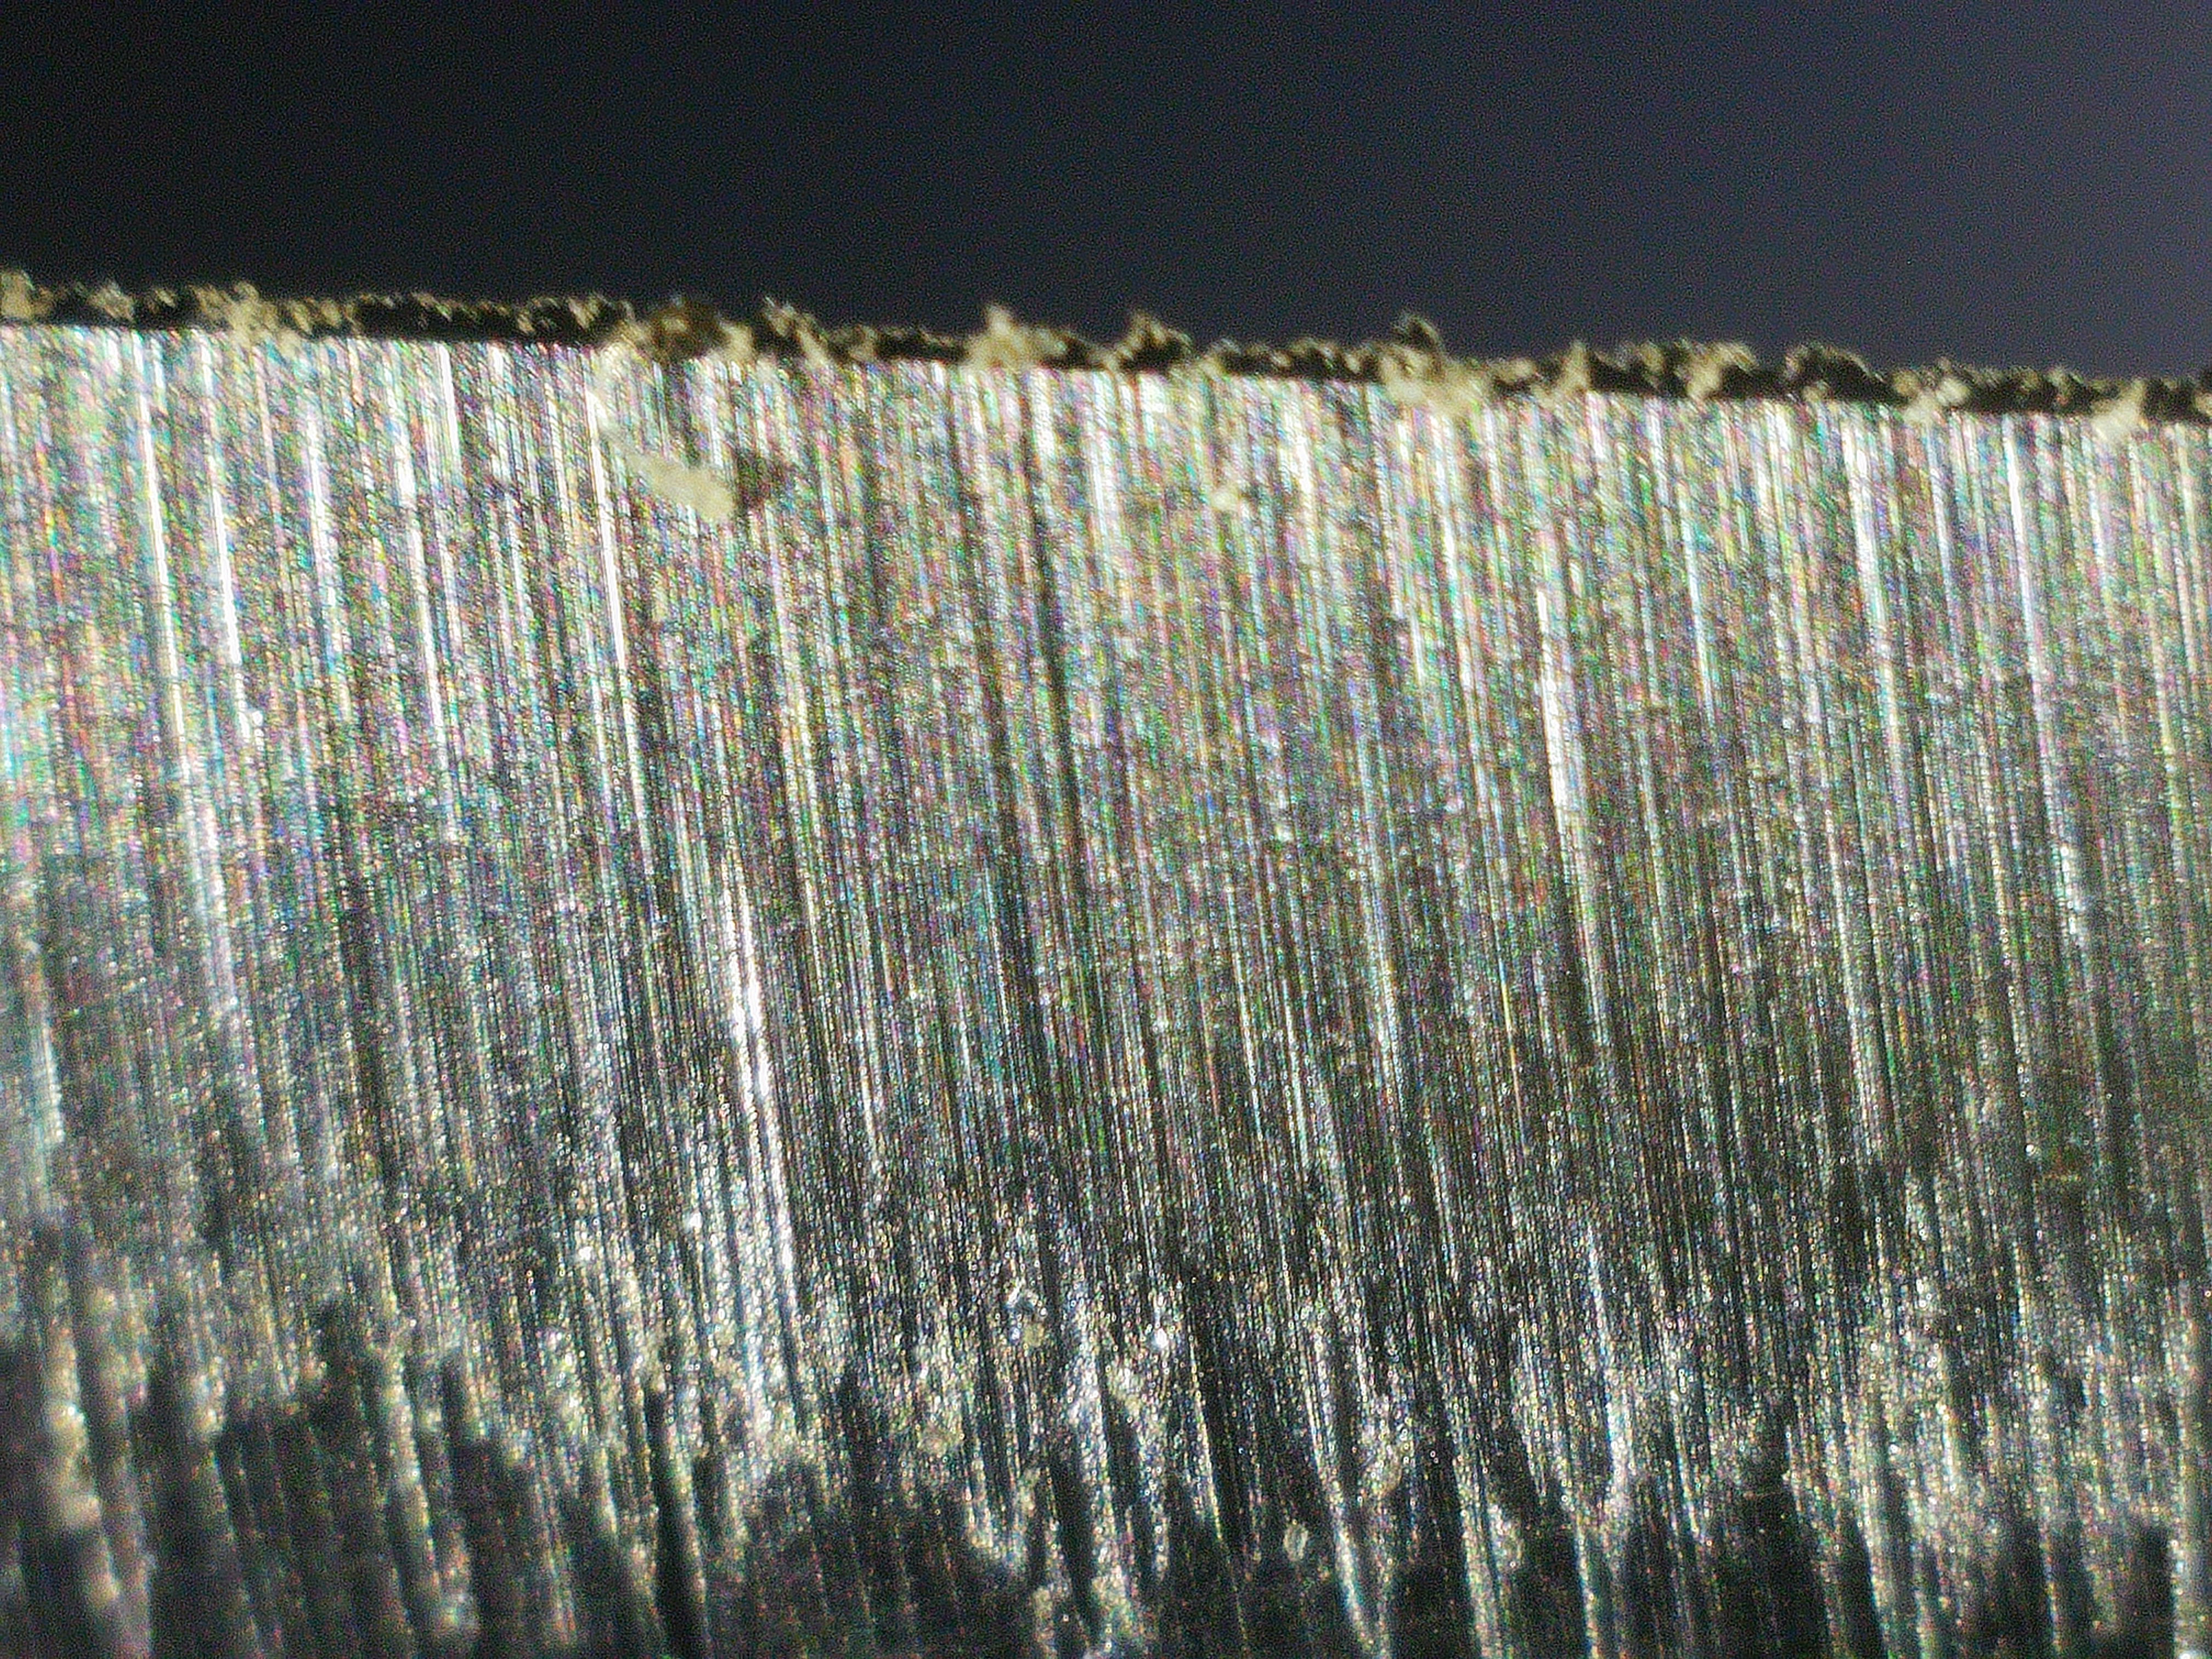
At this point, the sharpness tester reads around 210 grams of force, which is on par with a brand-new utility razor blade.
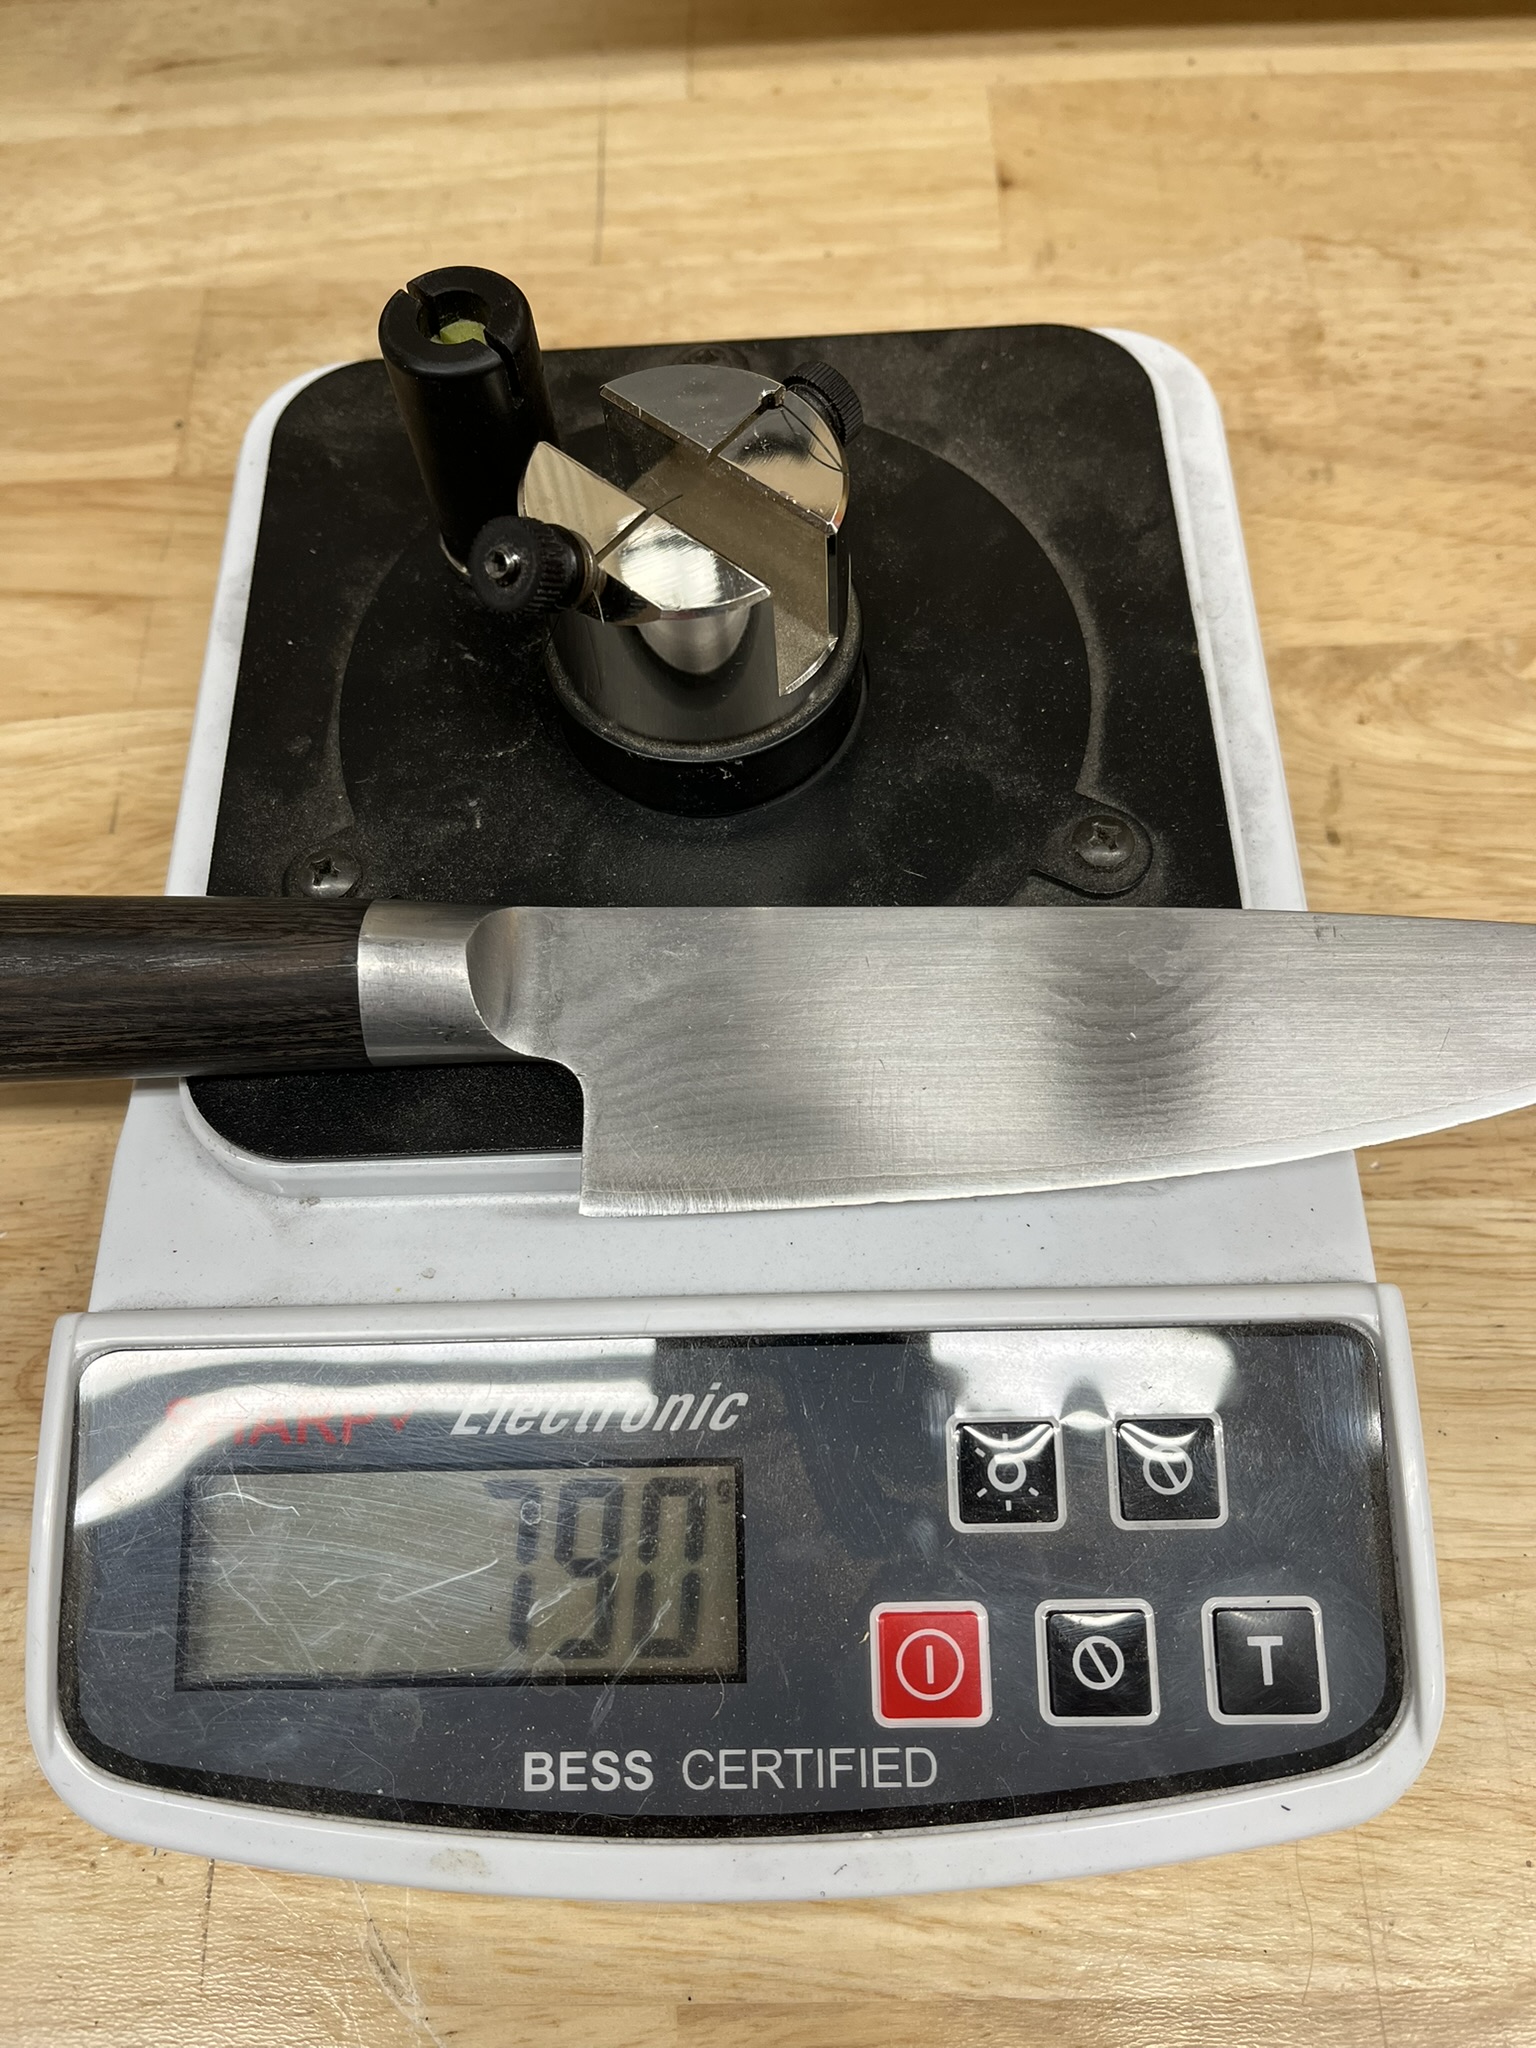
Step 4: Polishing Wheel Refinement
Now, we switch to an 8A medium-grit aluminum oxide finishing wheel. After a single pass on each side, the scratch pattern on the blade becomes even smoother, though a small burr remains.
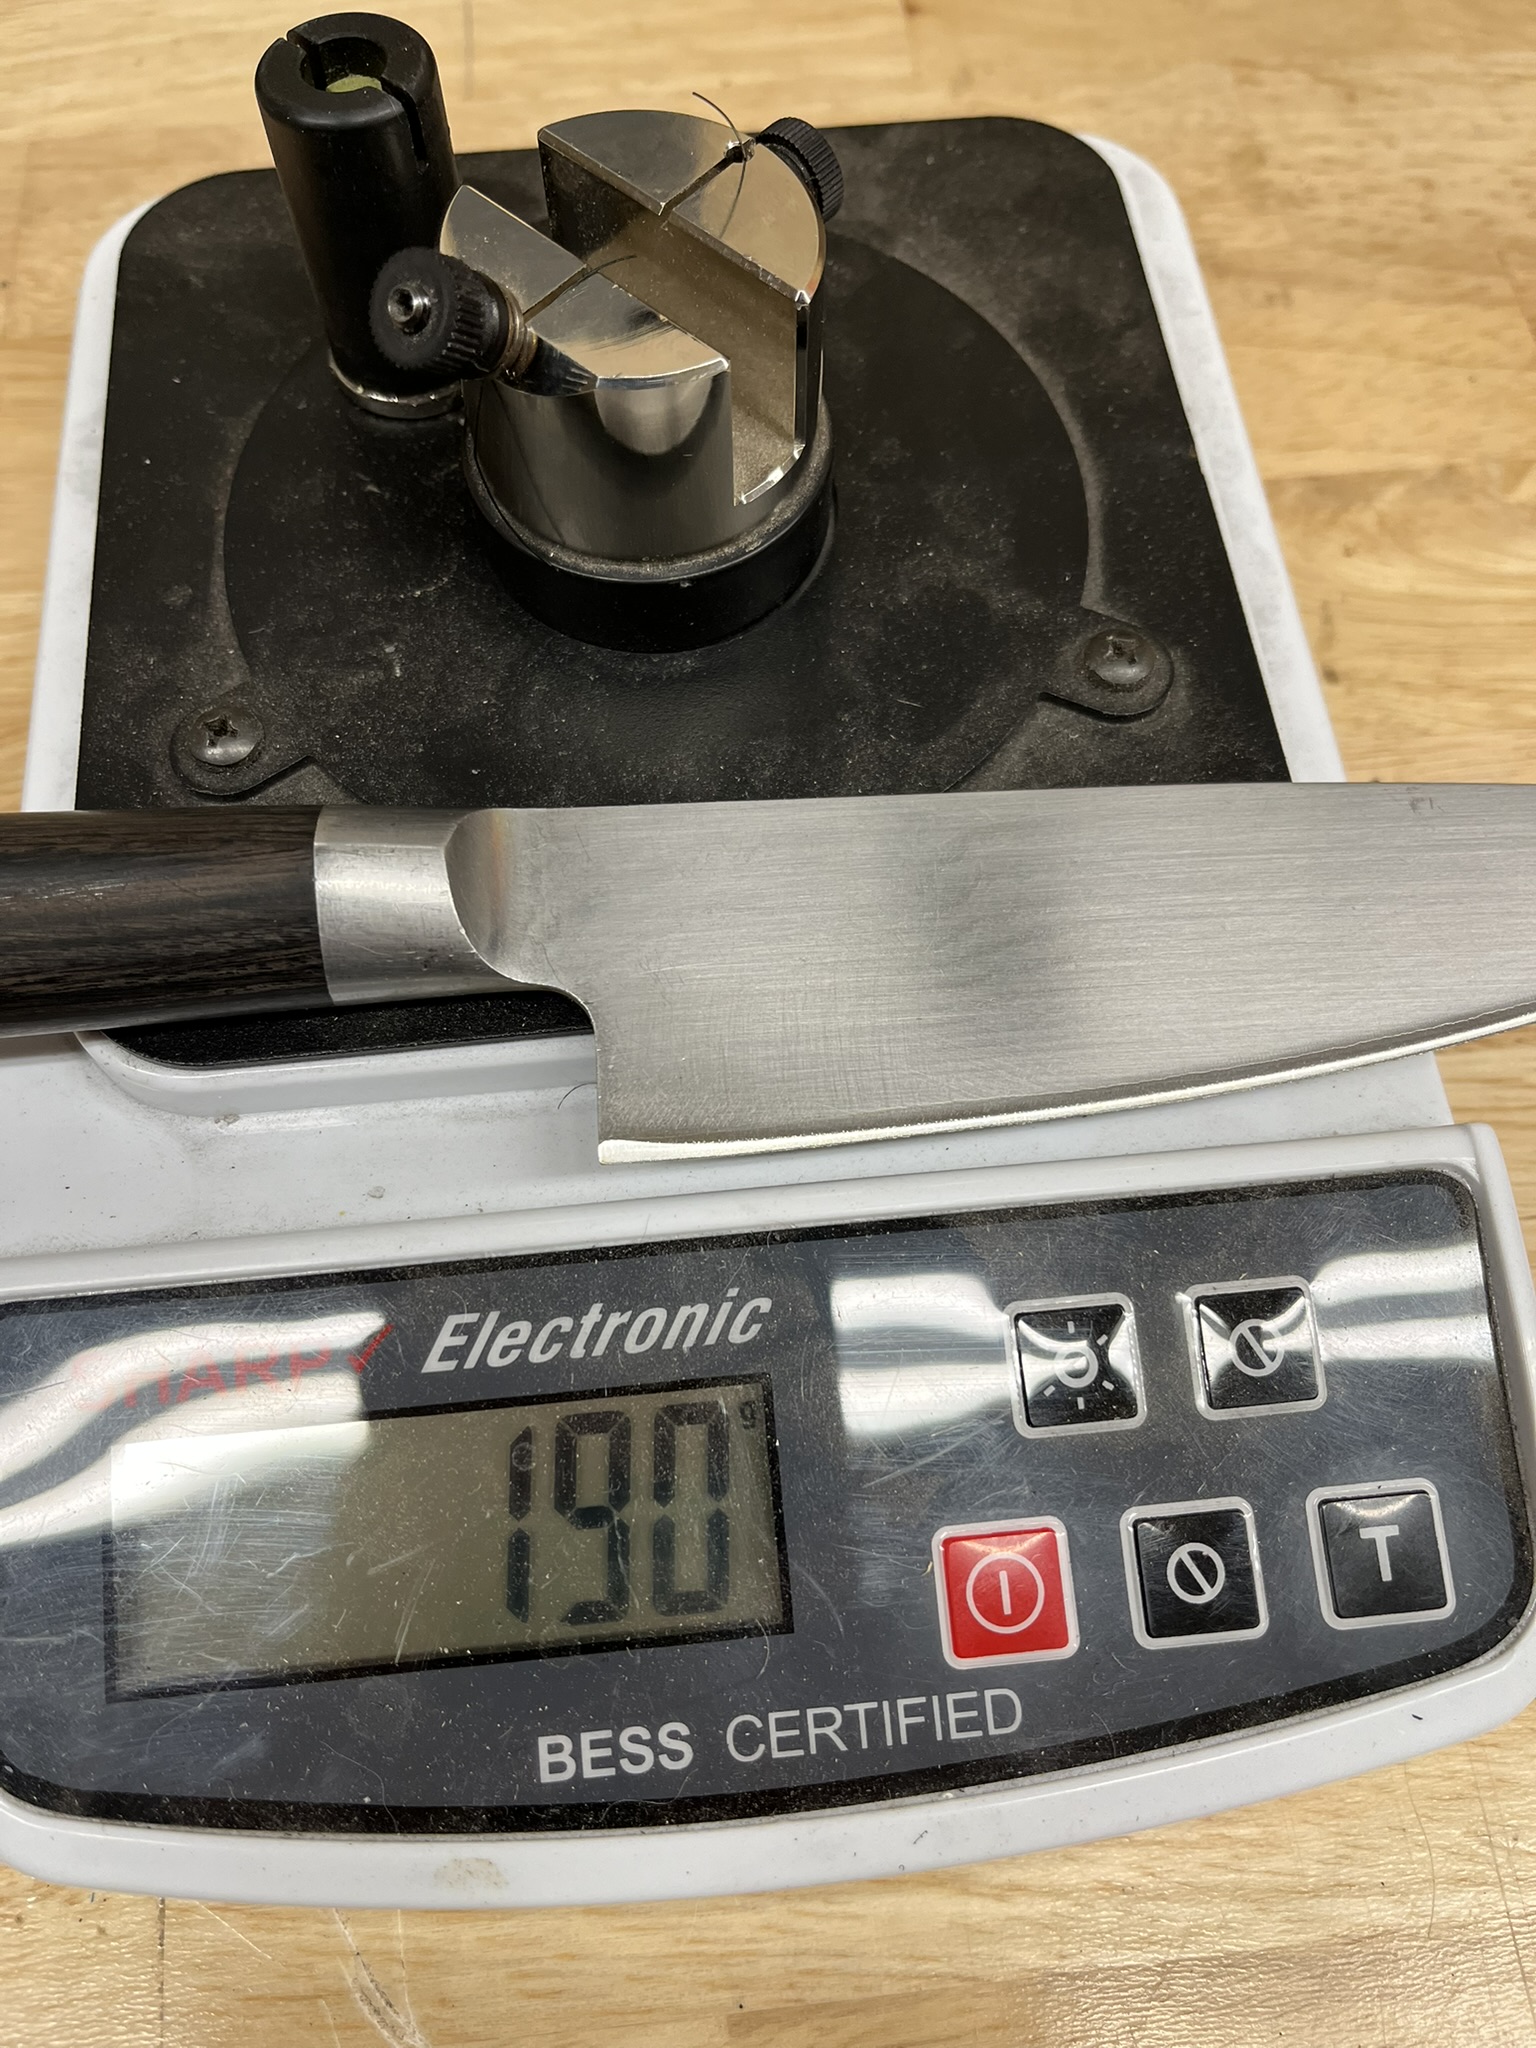
The knife now measures just 190 grams of force on the sharpness tester.
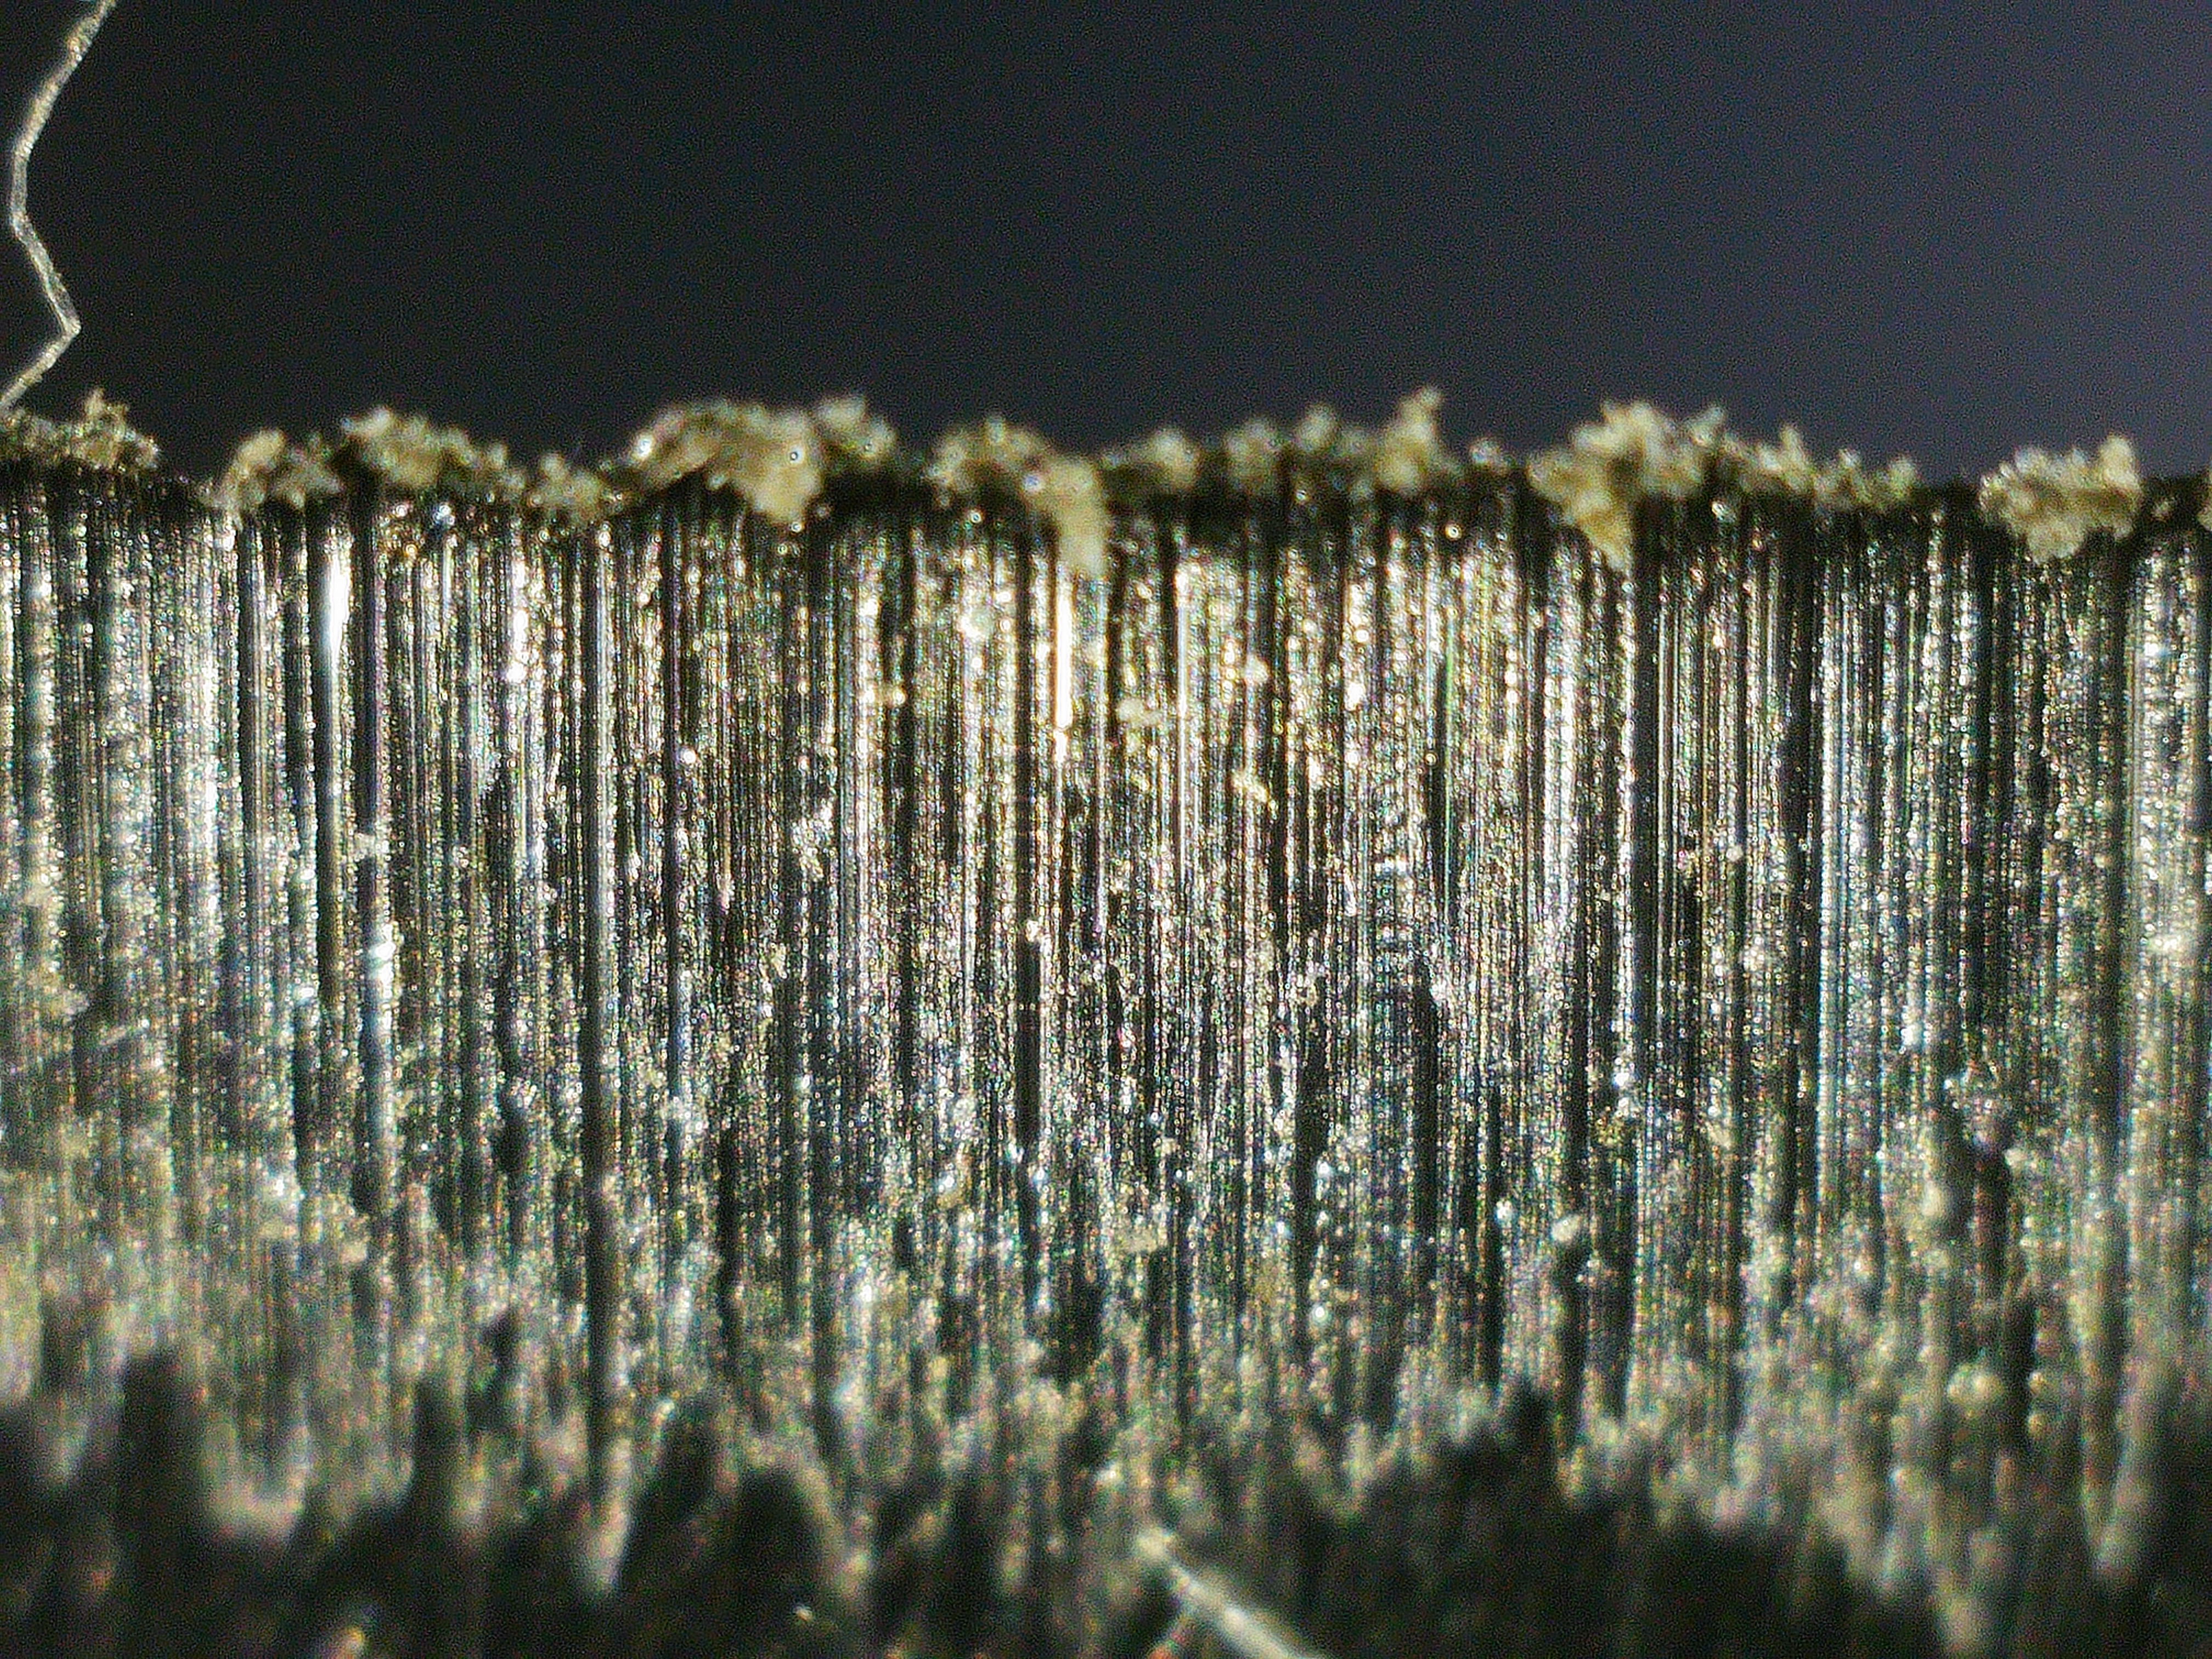
Step 5: Final Finishing Wheel Pass
We follow up with a 9S fine-grit silicon carbide polishing wheel, making one last pass per side. The burr is now almost entirely gone, and the cutting edge looks highly uniform under magnification.
At this stage, the knife requires only 155 grams of force to sever the test filament—an impressive level of sharpness. Whether push-cutting paper, slicing a ripe tomato, or catching on a thumbnail, this knife will pass any reasonable sharpness test.
Step 6: Honing on a Leather Strop
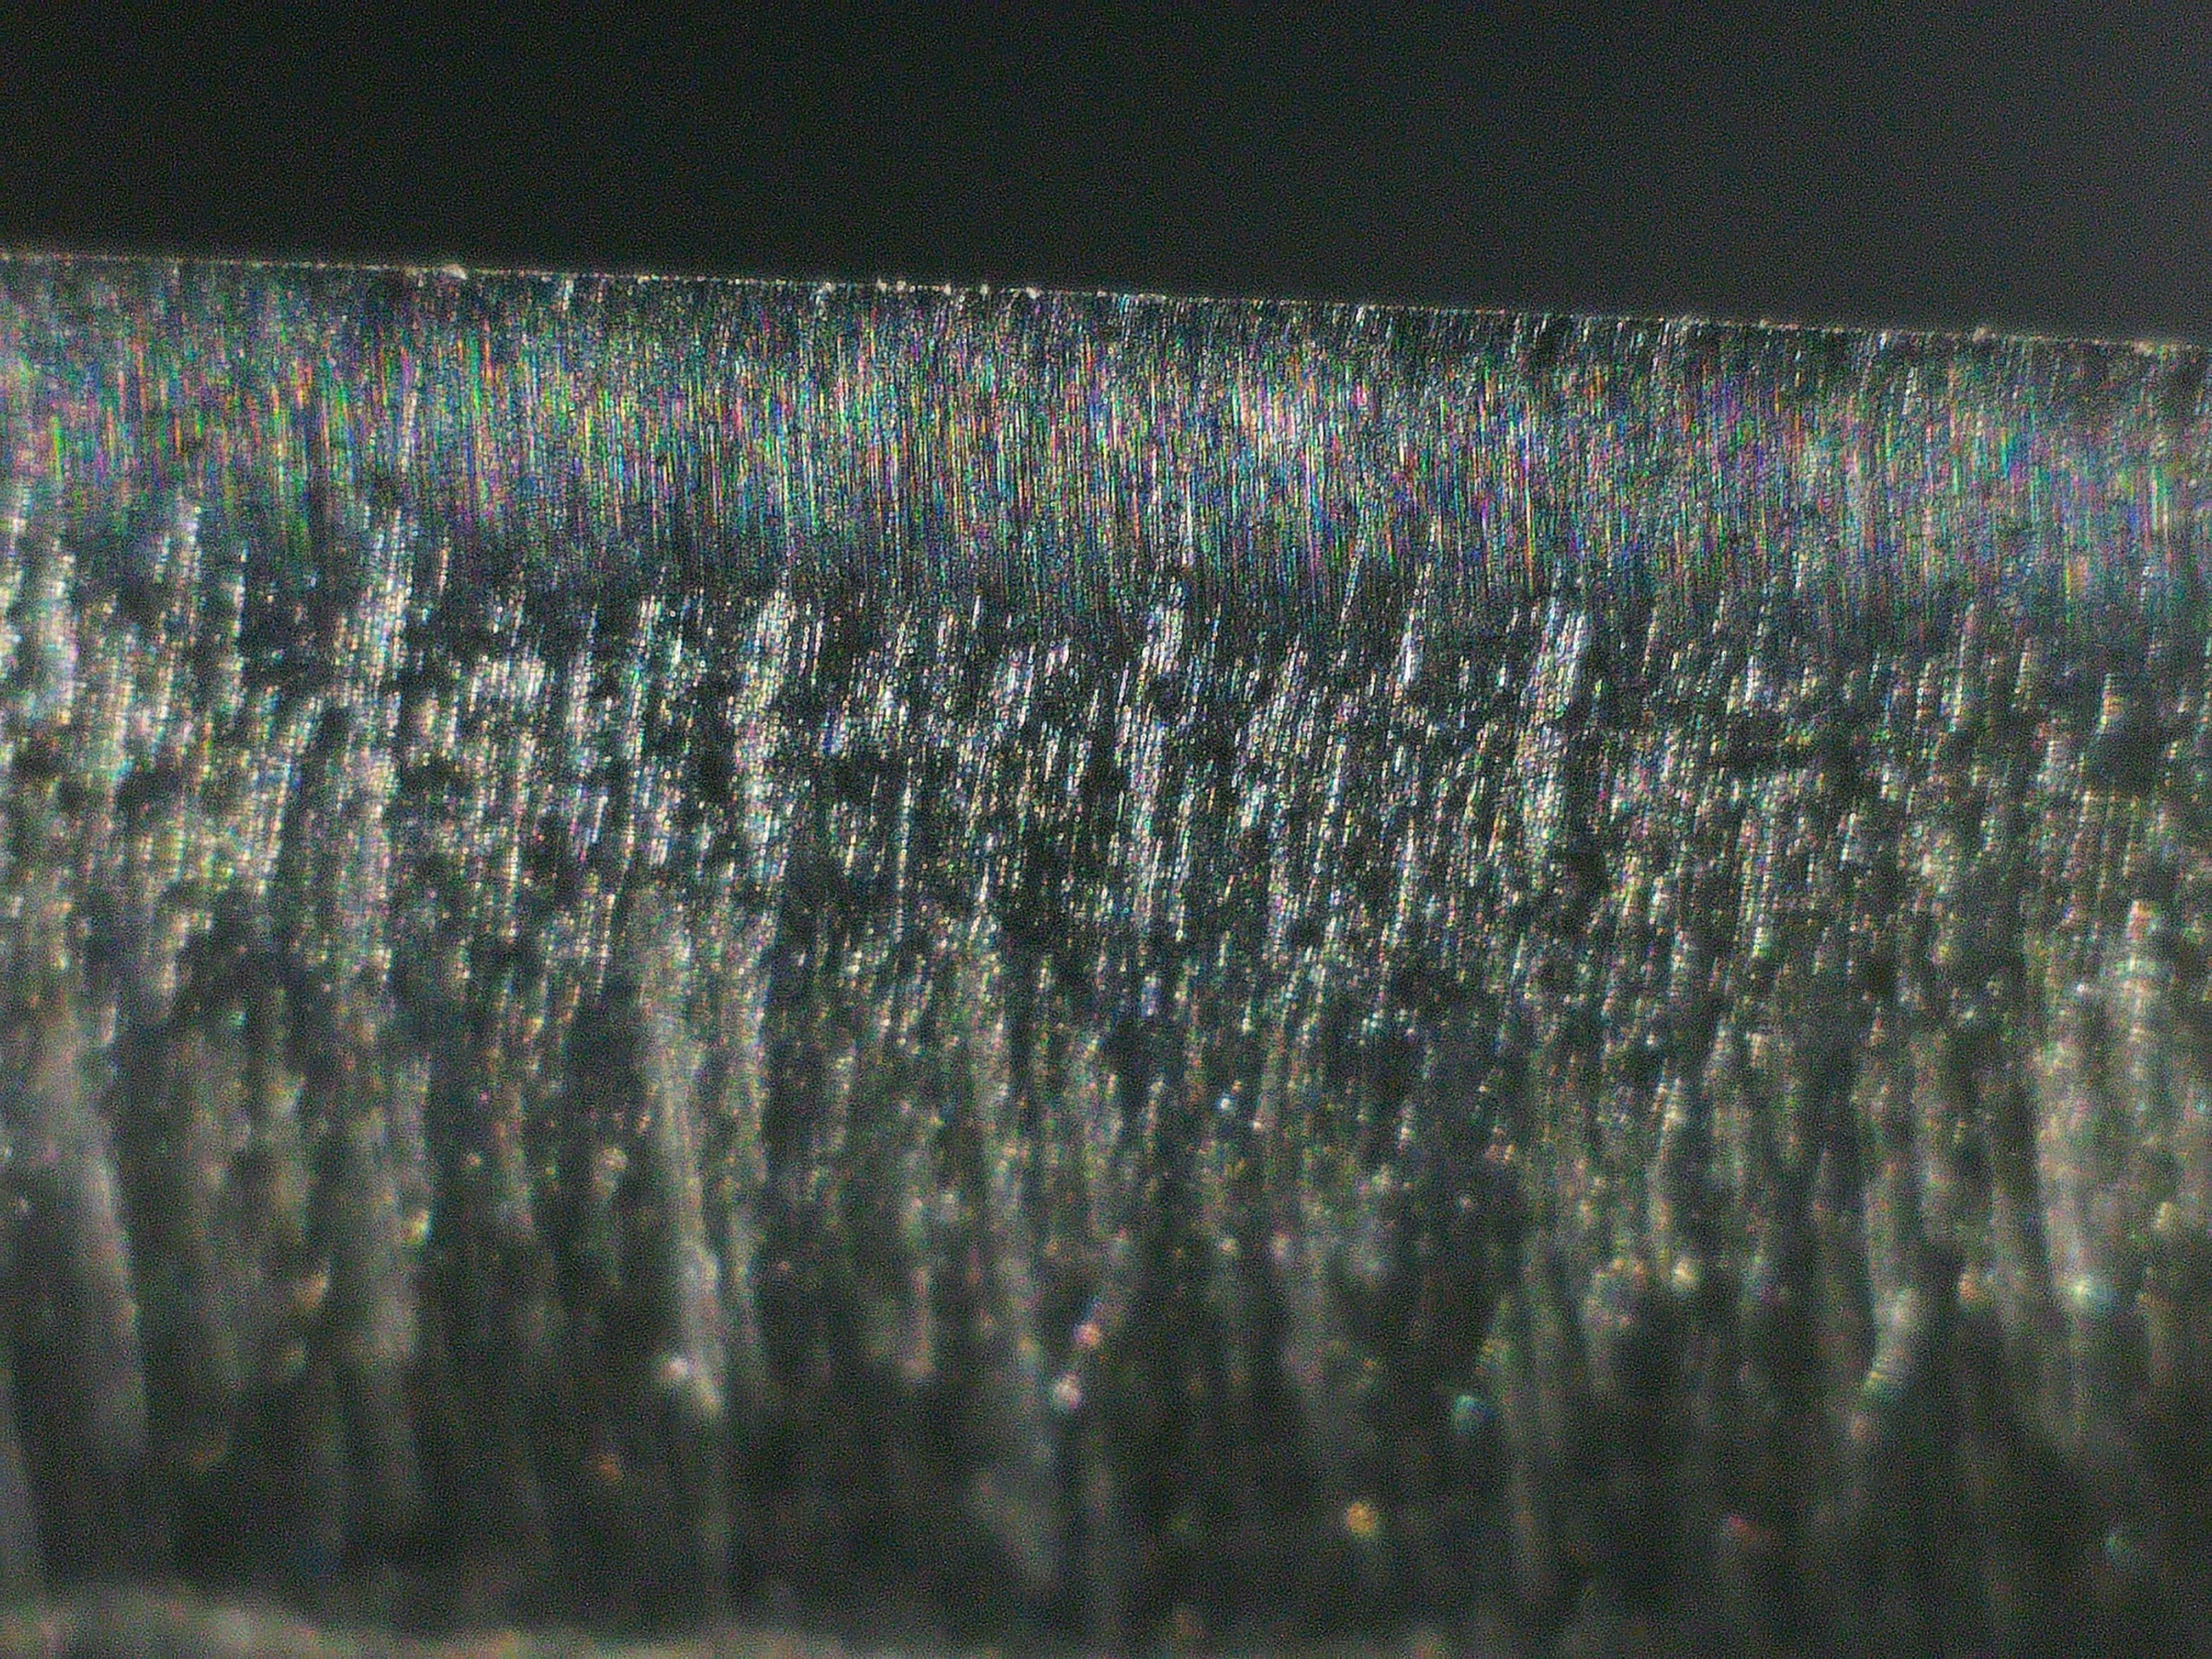
The final step is stropping the edge on a leather strop loaded with white diamond buffing compound. This polishes the edge to a nearly mirror finish and removes any remaining burr. Under high magnification, you can still see some fine scratch marks, but they’re barely perceptible.
For reference, this knife’s steel is 58-60 HRC on the Rockwell scale, meaning it holds a fine edge but requires more precise sharpening. A softer Western knife (~52 HRC) would appear even more polished at this stage.
With the sharpening complete, this knife is ready for the most demanding kitchen tasks. It is hair-shaving sharp!
If you’ve grown accustomed to dull knives, be careful—this level of sharpness takes some getting used to.